Frontend - end user
Introduction
Welcome to Kadanza GraFx Experience, your gateway to creating, managing, and producing brand-consistent materials with ease.
This manual is designed to guide end-users through every step of working in the Kadanza platform, from browsing available templates and creating projects, to reviewing previews and generating production outputs.
1. Creating campaigns (projects)
Step 1 – Open the Content Store
Go to the Content Store page — this is where all templates you’re allowed to use are displayed. Each template card shows a preview image, a short description, and a Create project button.
To start a new campaign:
- Browse through the available templates.
- Use the search bar or filters to narrow down results if needed.
- Click Create project on the template you want to use.

Step 2 – Name Your Project
After selecting a template, a pop-up appears prompting you to name your project.
To continue:
- Enter a descriptive project name in the Name field (e.g., Product Launch Q1 2025).
- Click Create.

Step 3 – Select Layouts
Once you’ve created your project, the Select layouts window appears. Here, you can choose which layouts (formats) to include in your campaign.
Layouts can include:
- Print formats (like A4, A5, posters, flyers)
- Digital formats (lik social posts, banners, story ads)
To continue:
- Review the list of available layouts: use the tabs All, Print, or Digital to filter.
- Click each layout you want to include (you can select multiple).
- When ready, click Create to generate your project.

Step 4 – Start Editing
After creating your project, the Editing Experience opens automatically. This is where you personalize your selected layouts using the pre-defined brand templates.

Changing variables
On the left-hand side, you’ll find the Customize panel, where all variables are listed. These can be
- Text fields – Change headlines, body text, or product names.
- Image fields – Replace visuals by uploading new images or selecting from the media library.
- Select fields – Update dynamic content like country, language, topic.
When selecting a variable, the tabs and layouts that will be affected by the changes are highlighted in the layout tabs, so you know exactly which layout will be affected by the changes made.

As you edit, all changes instantly appear in the layout previews on the right. You can switch between individual layouts using the tabs at the top.
Adding layouts
You can add extra layouts to your project after you started editing. Clicking the “+” icon in the upper right corner opens the “Add layout” modal in which you can select additional layouts. The ones that are already added to the project are greyed out and can’t be selected.

Unlinking layouts
While creating at scale means that you can update any content simultaneously in different layouts, it is possible to make changes to a specific layout only. That way, you can create a project and add exceptions to a single layout. Unlinked layouts will be highlighted in a different color. Changes made to the variables in the All layouts tab will not affect the unlinked layout. And vice versa, changes made to variables in the unlinked layout won’t affect the other layouts in the project.

Other layout options
Clicking the context menu [ … ] next to each layout opens a dropdown with different layout options. Aside from unlinking a layout, you can
- Rename a layout
- Duplicate a layout in a project
- Remove a layout from a project

Step 5 – Save and Preview
When you’re happy with your edits, click Save to keep your changes. You can always come back later to make updates — your project is saved under the Projects page.
2. My projects
2.1. Overview pages
On the ‘My projects’ page, users can see all the projects that they have created. In the ‘All projects’ section, users can see projects created by other users. Which projects are listed here depends on the permissions defined in the project component.

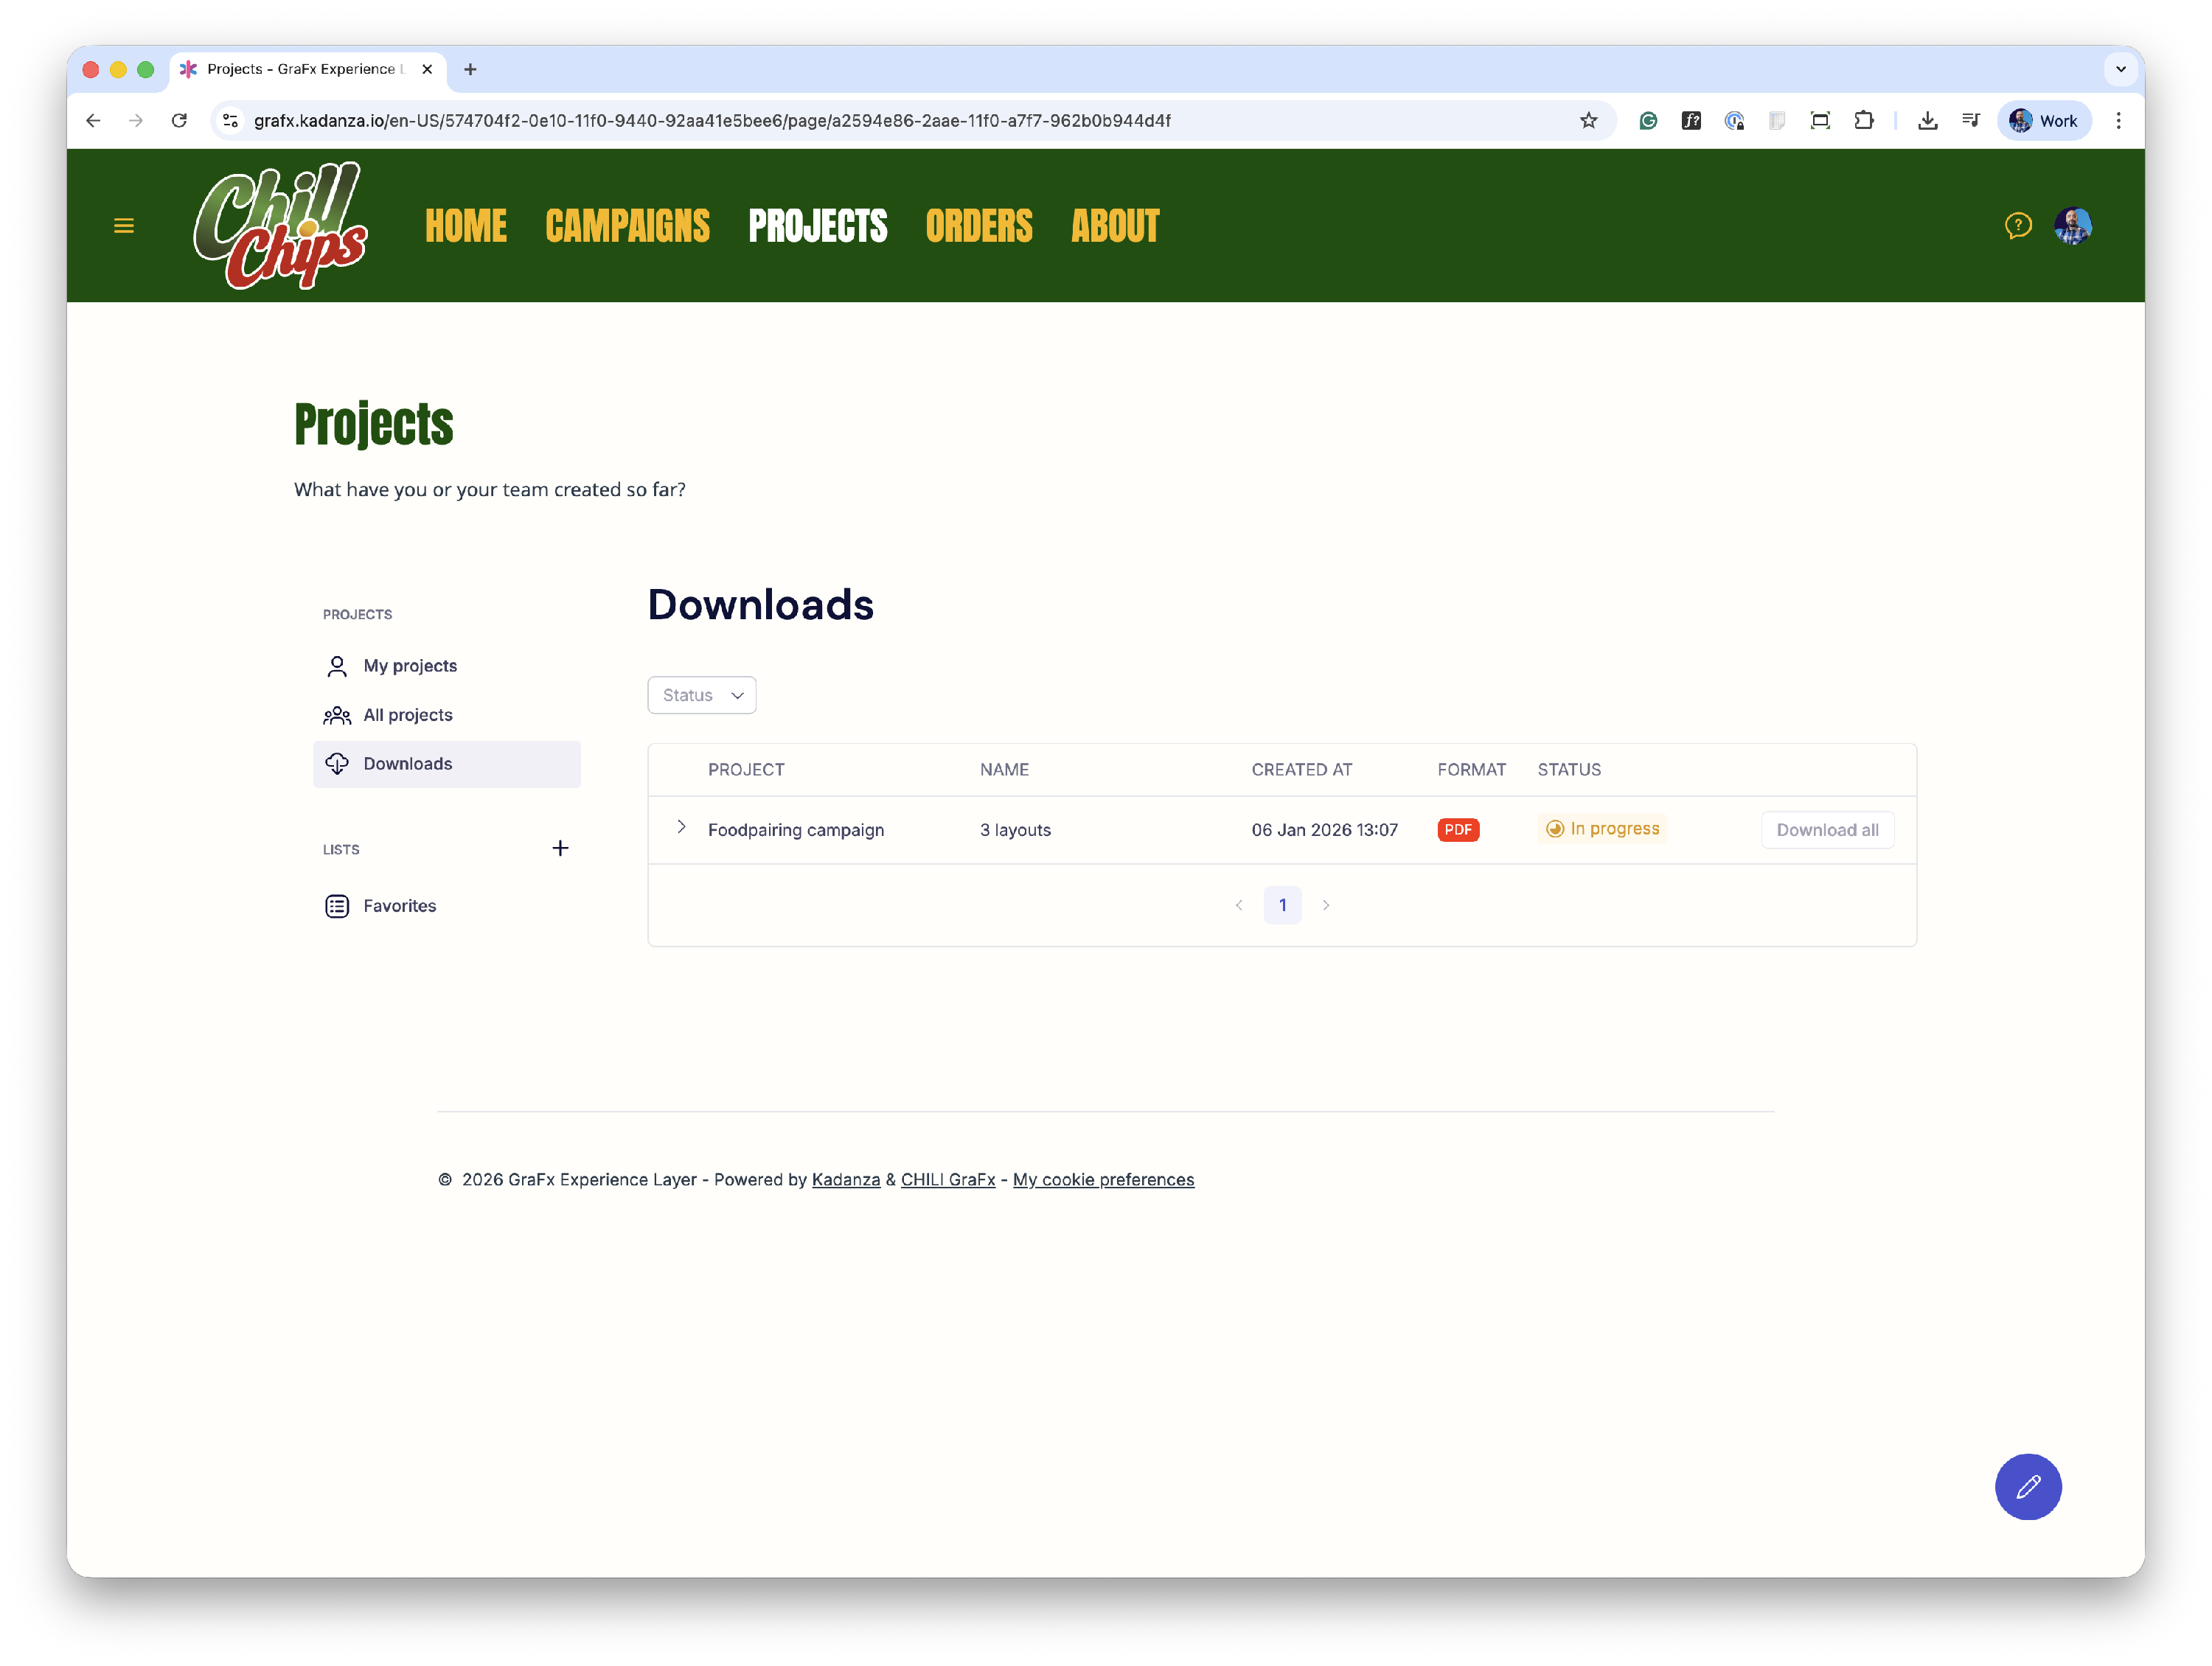
On the ‘Downloads’ page, a user can see all the downloads that he requested. When the download is ready, the status is updated and the file (or files) can be downloaded.
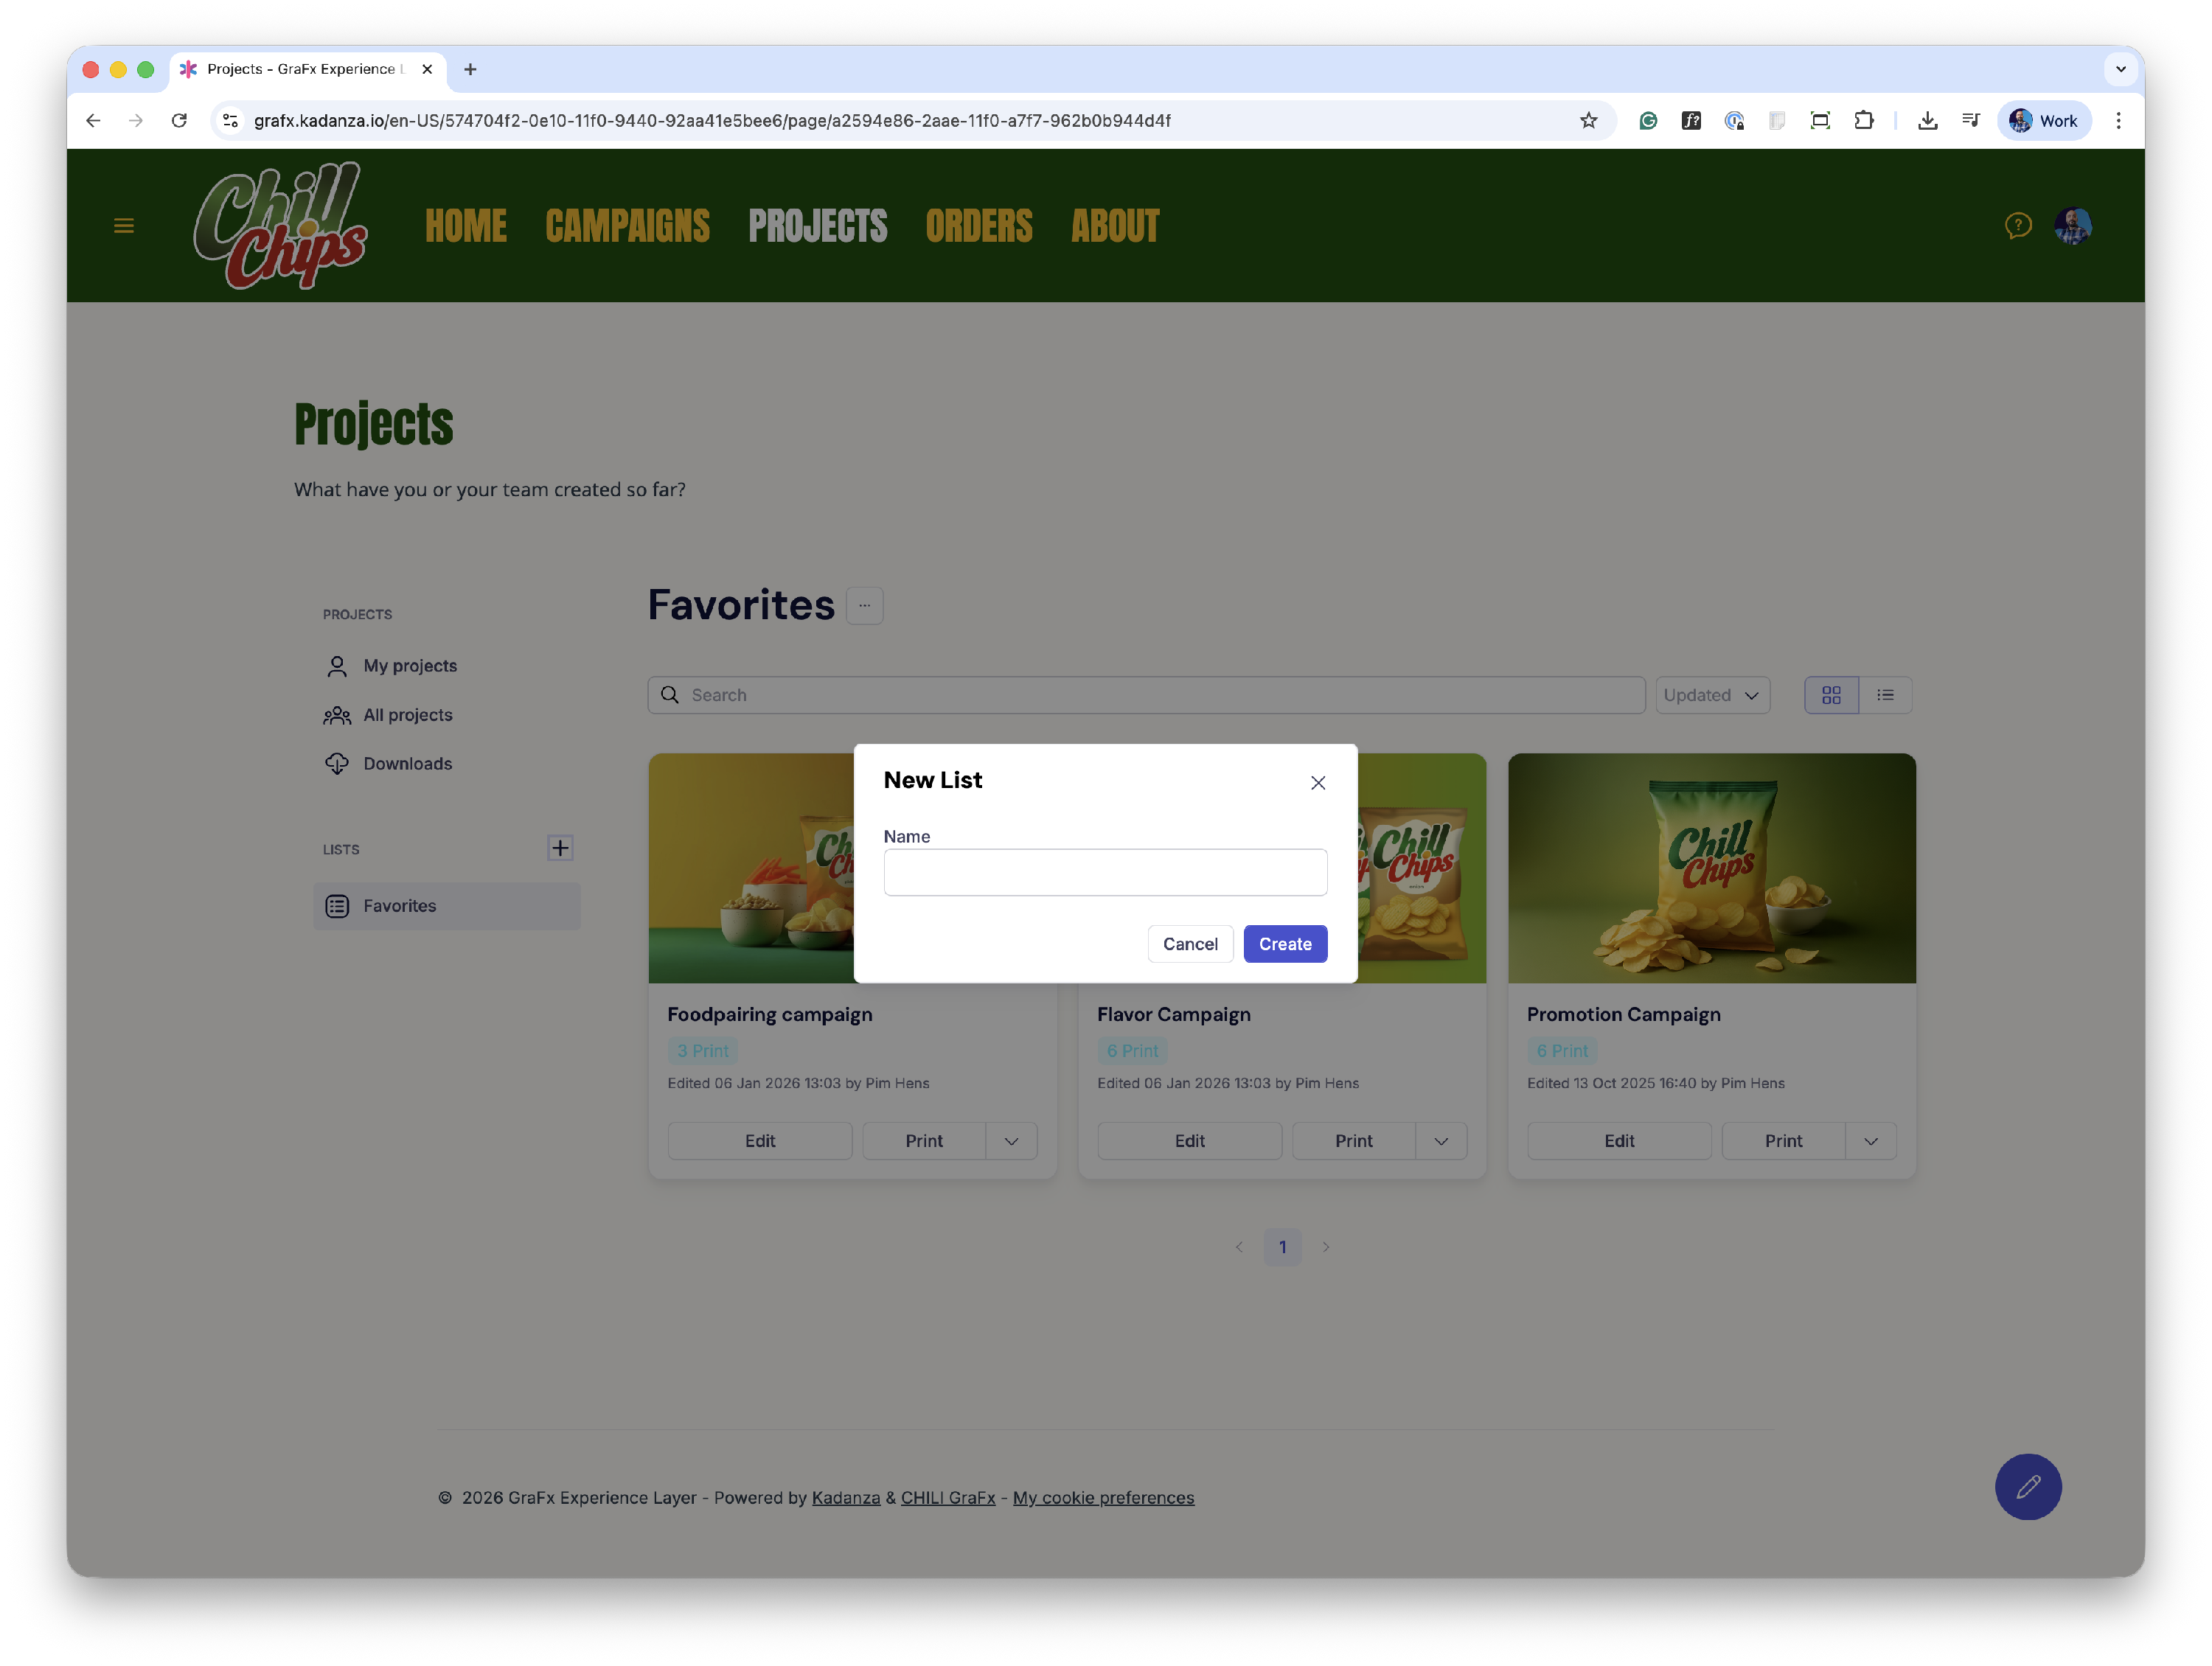
In the ‘Lists’ section, users can create lists to group projects for easier navigation.
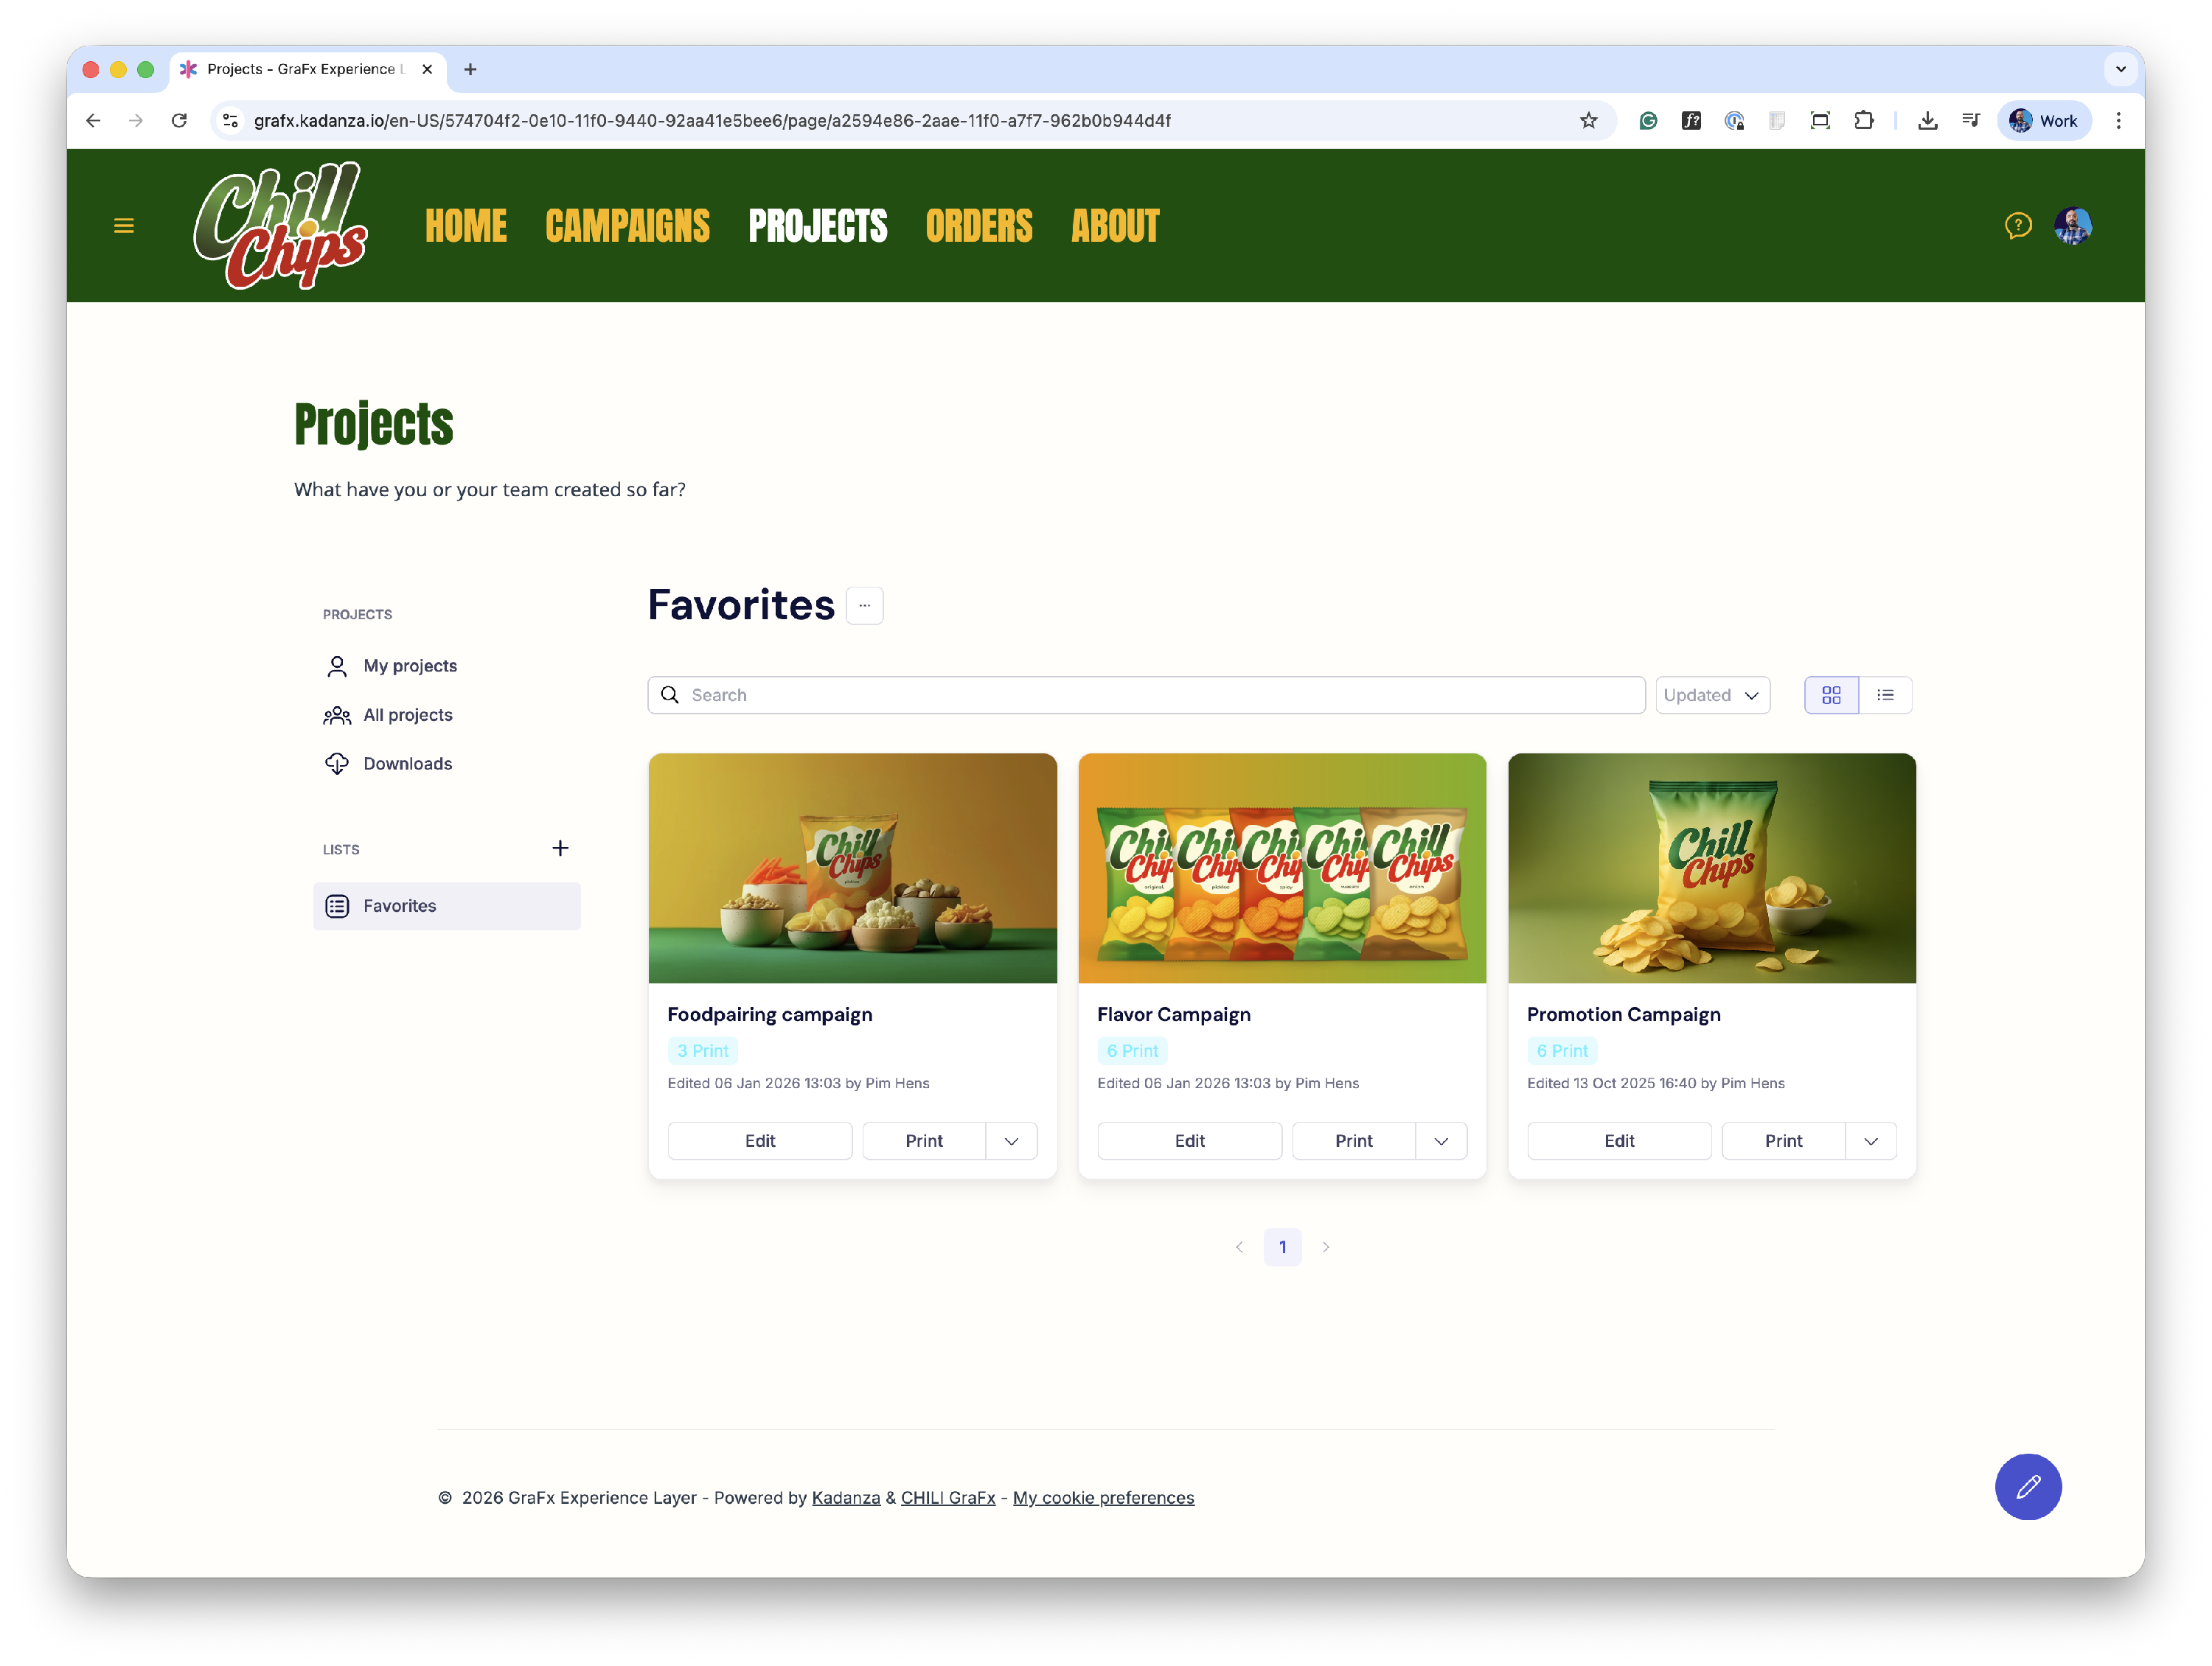
Projects can be added to one of the lists by clicking the list options in the upper left corner of a project thumbnail.
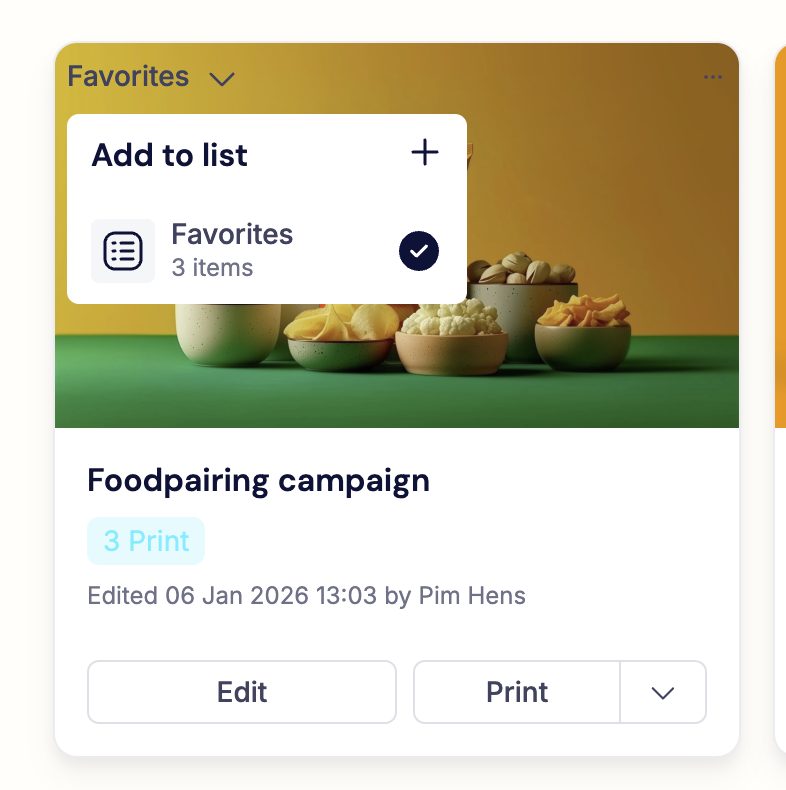
The ‘Favorites’ list is available by default, but users can create as many lists as needed. Lists that were created by a user can be renamed or deleted. Projects can be added to multiple lists. When a list is deleted, the projects will still be available in the ‘My projects’ section or in any other lists they were added to.
2.2. Downloading and ordering projects
When a project is created, edited and saved, it can be downloaded or sent to a print partner (when there are print partners configured in your installation). The different print options available for a project are shown after clicking the “Print” dropdown below the project thumbnail.
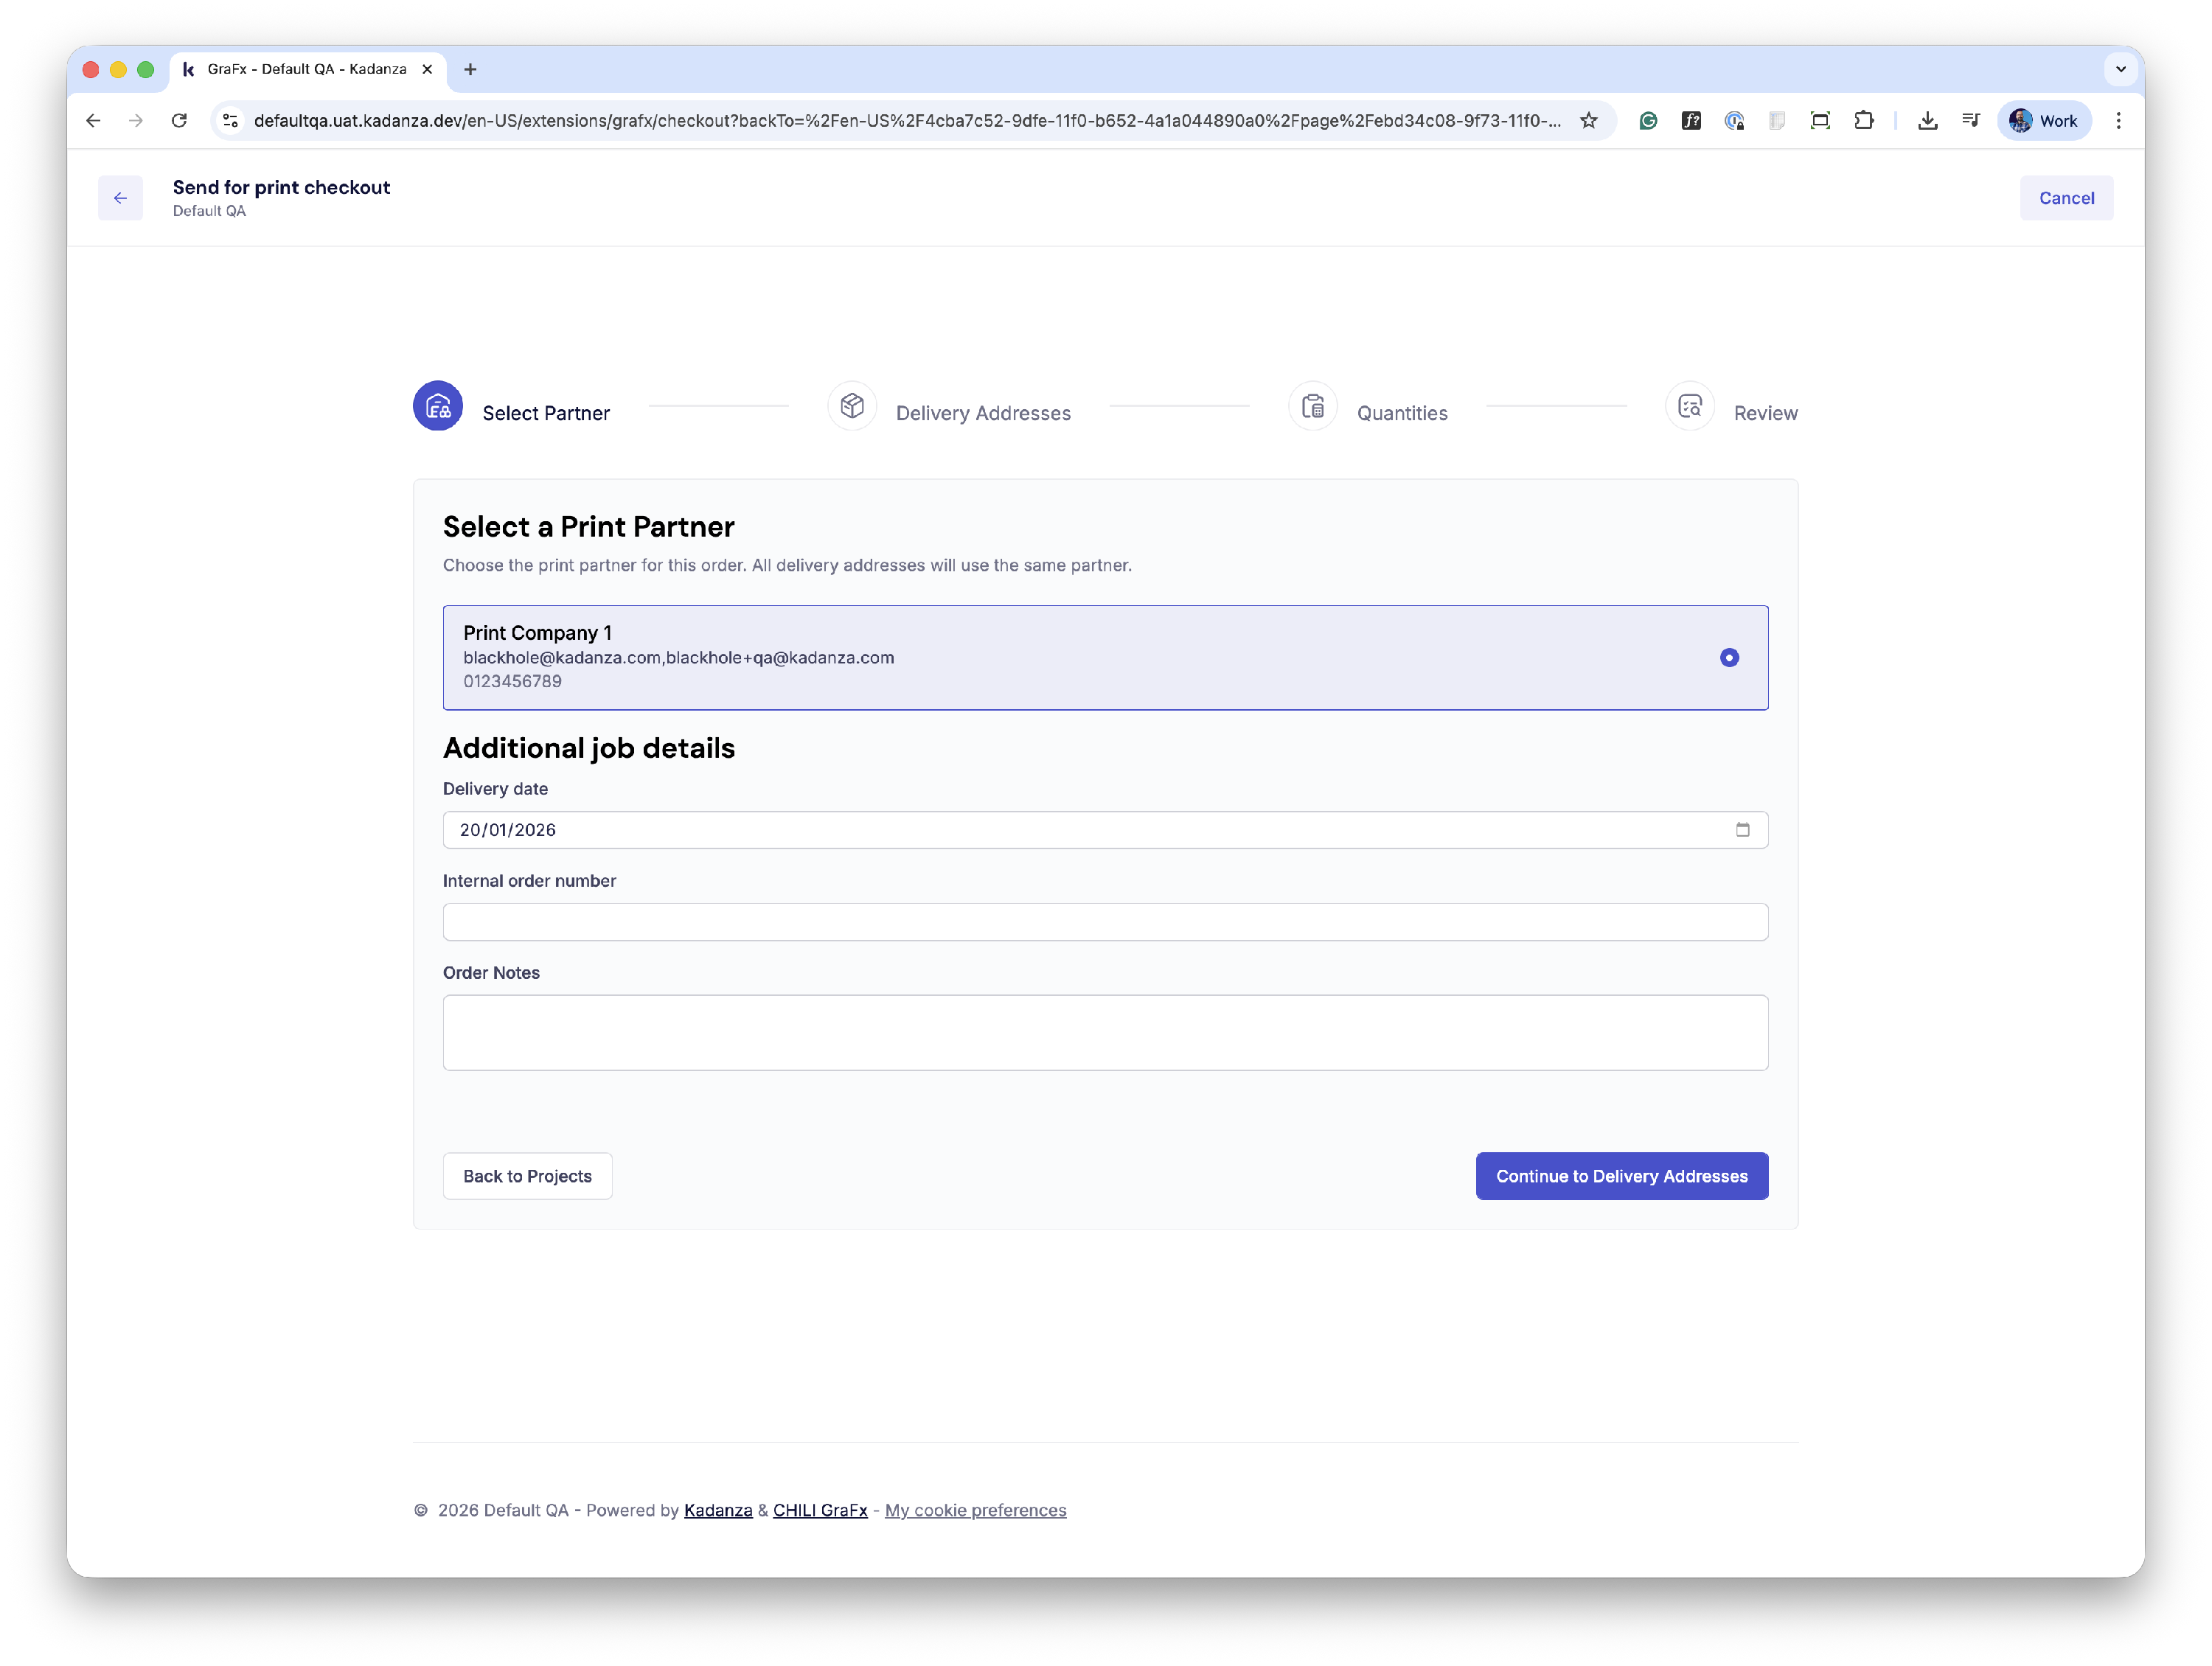
When one or more print partners are configured in your installation, it is possible to order projects directly from the available print partners. Ordering is done in four steps
Step 1: Select print partner
In this step, you can select one (or more) of the available print partners. You can also add additional job details, such as a desired delivery date (*), an internal order number and extra notes. When ready, proceed to step 2.
(*) This date is purely informational for the printer. Once the order is received, more details on delivery will be comunicated by the print partner.
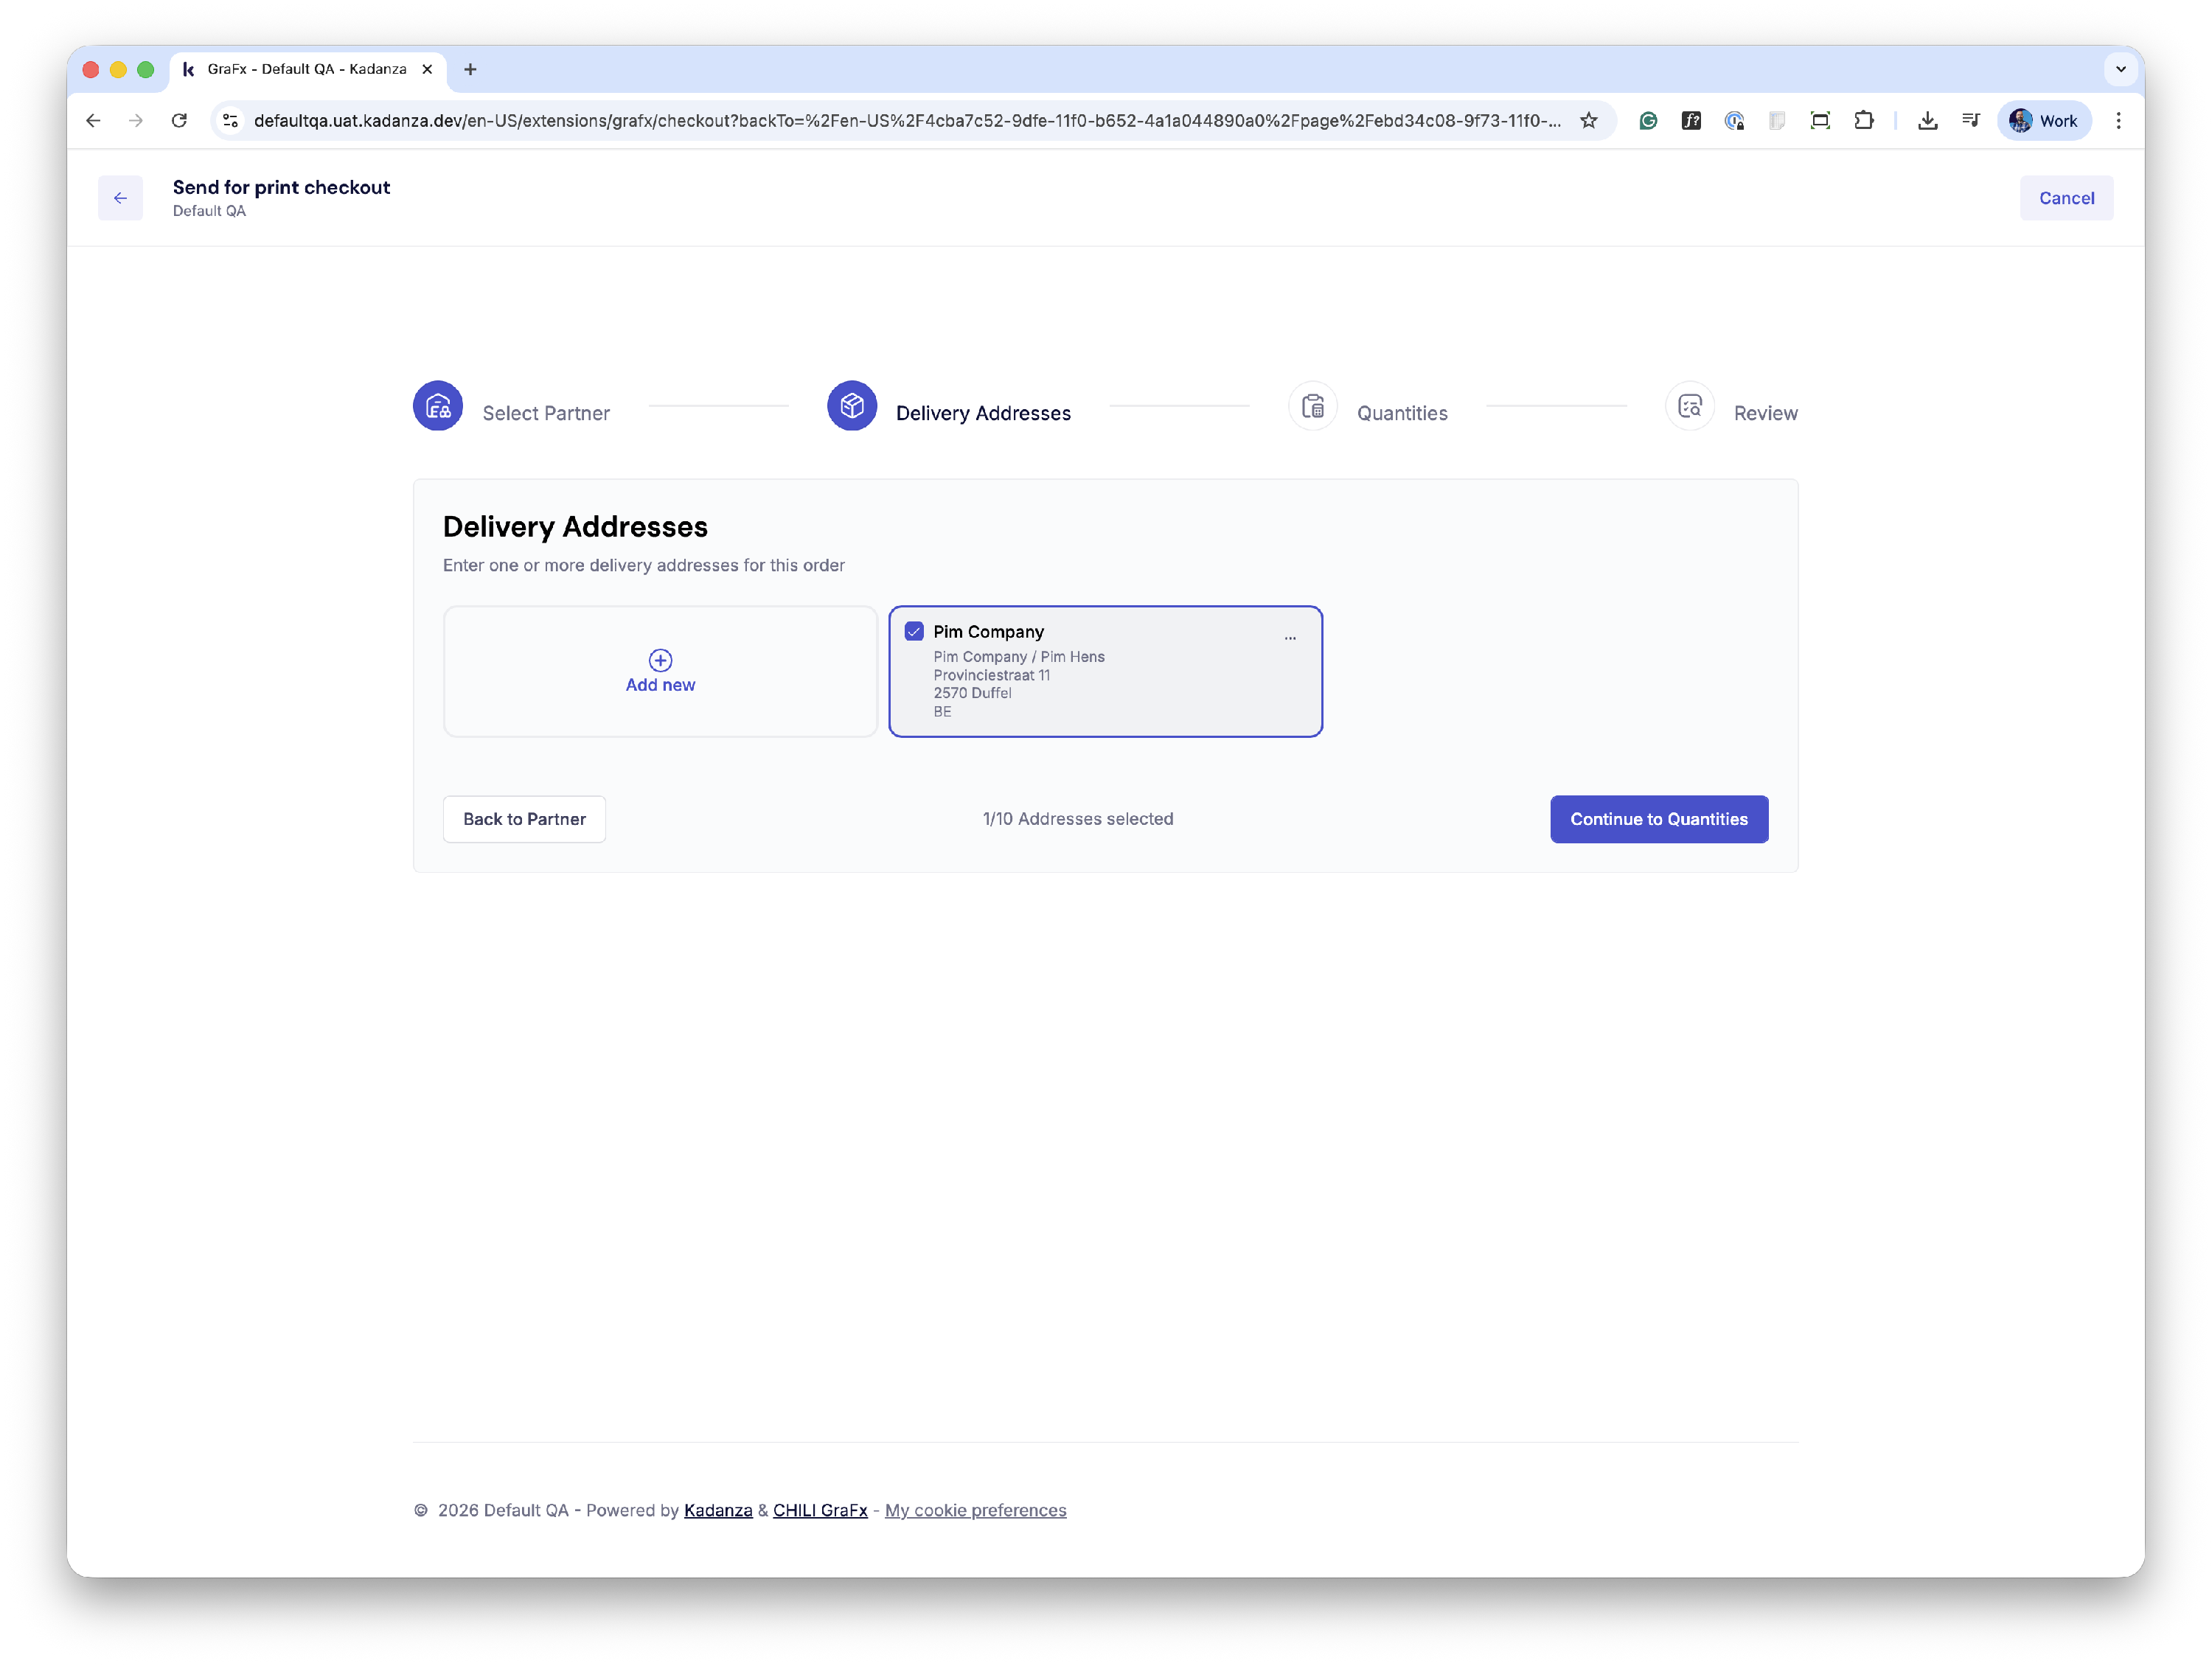
Step 2: Enter delivery address
You can create one or more delivery addresses for the print order.
It is possible to enter multiple delivery addresses for your order, and even select different quantities in step 3.
When you have selected the desired delivery address(es), proceed to step 3.
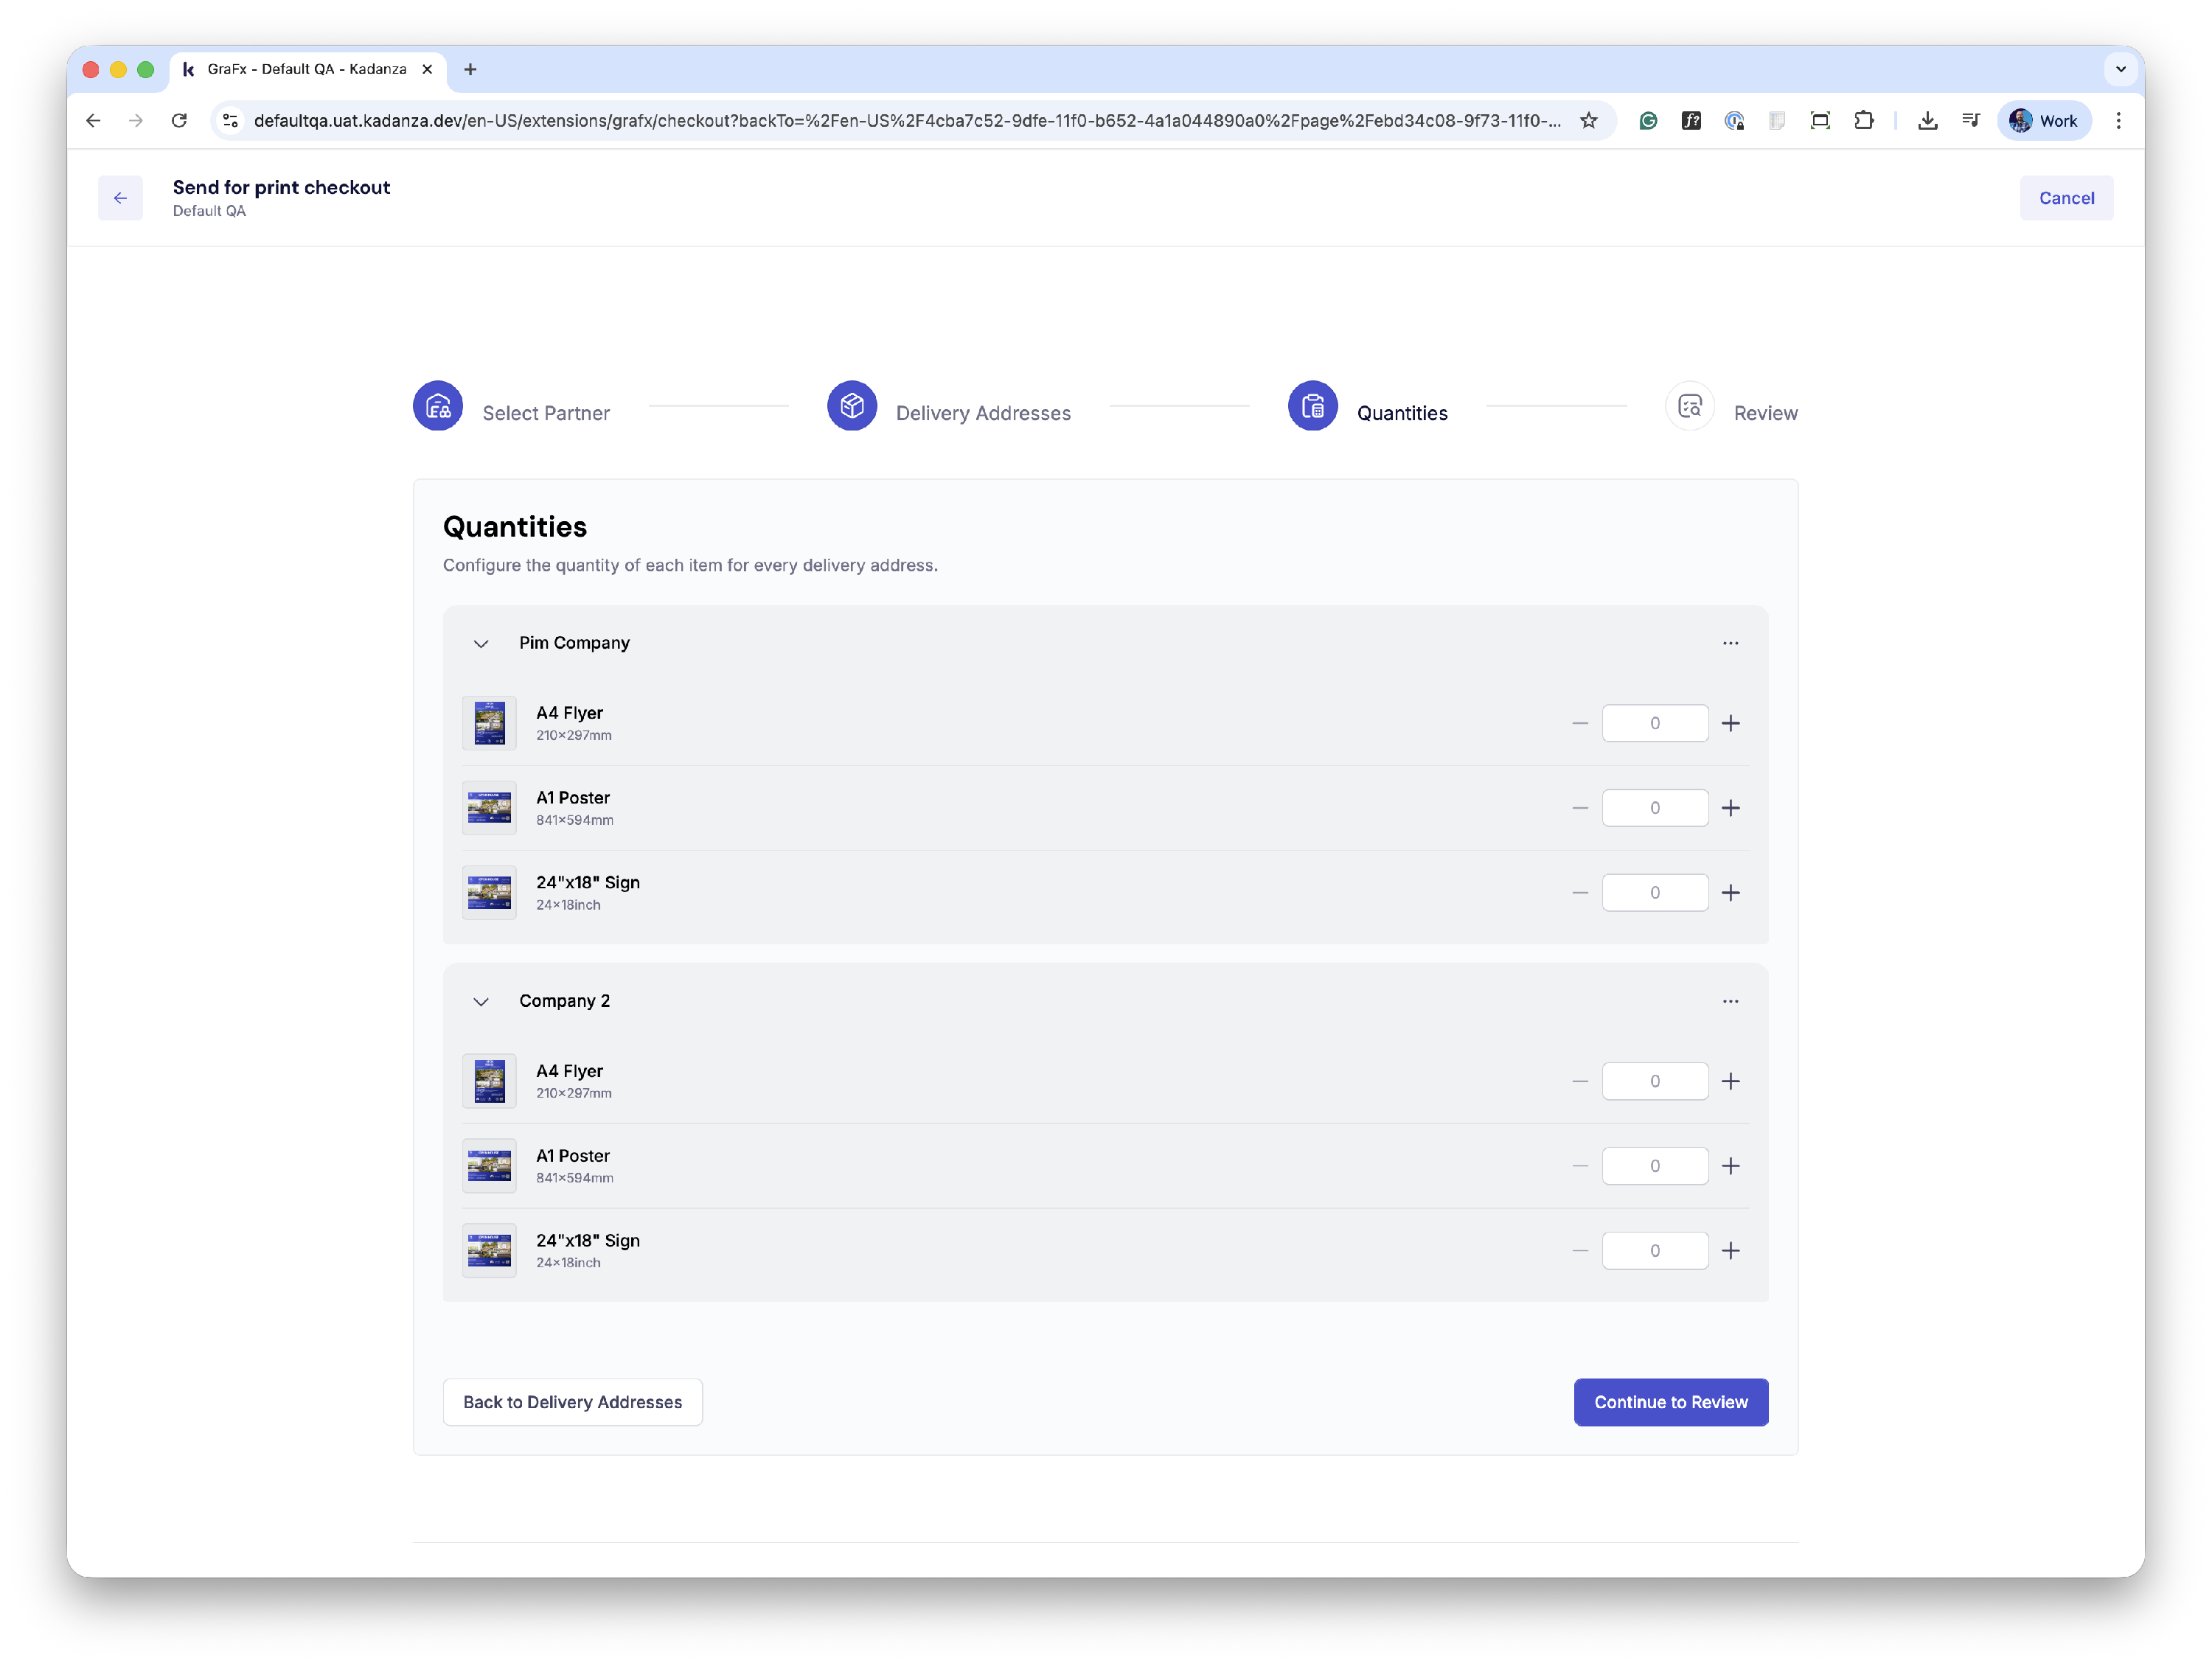
Step 3: Quantities
Here you can enter the number of prints you want to receive from each layout in your project.
When you have selected multiple delivery addresses, you can add different quantities for each selected address.
When all the quantities are entered, proceed to step 4.
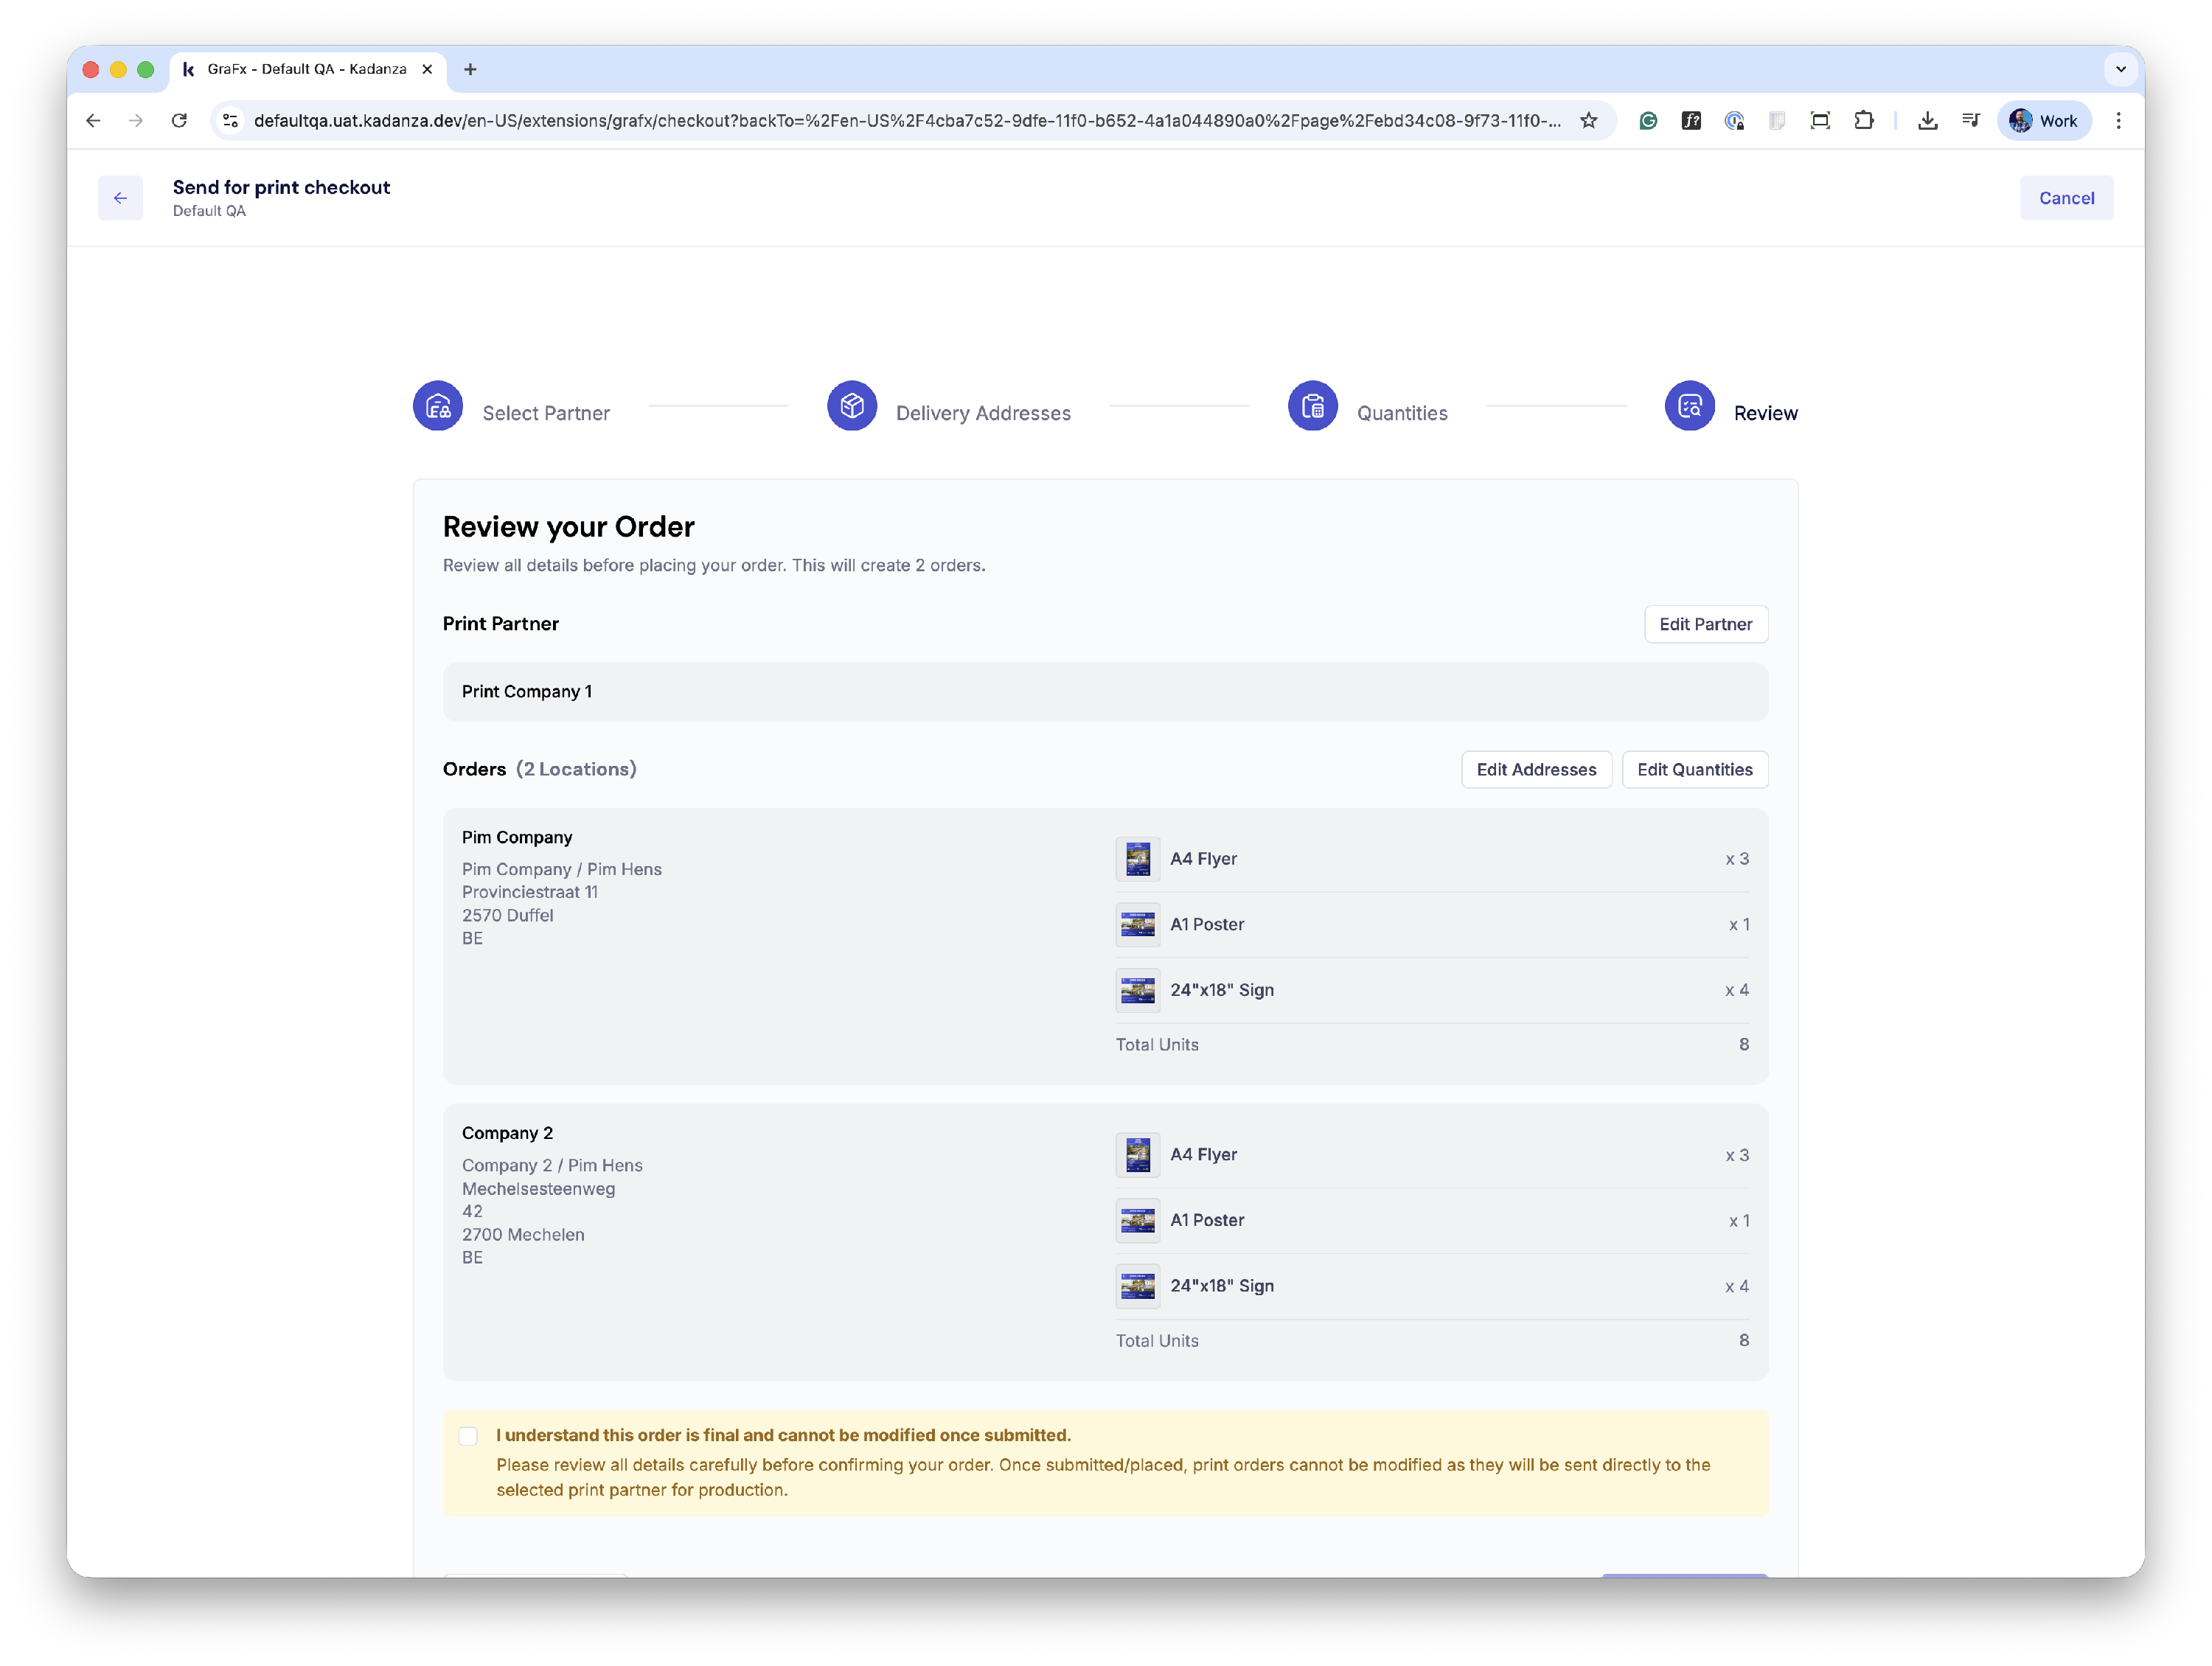
Step 4: Review your order
In this last step, you can review your order before finalizing it and sending it to the print partner. Make sure everything is correct, and when ready, place your order.
2.3. My order history
When orders are placed, they will become visible on the ‘My order history’ page.
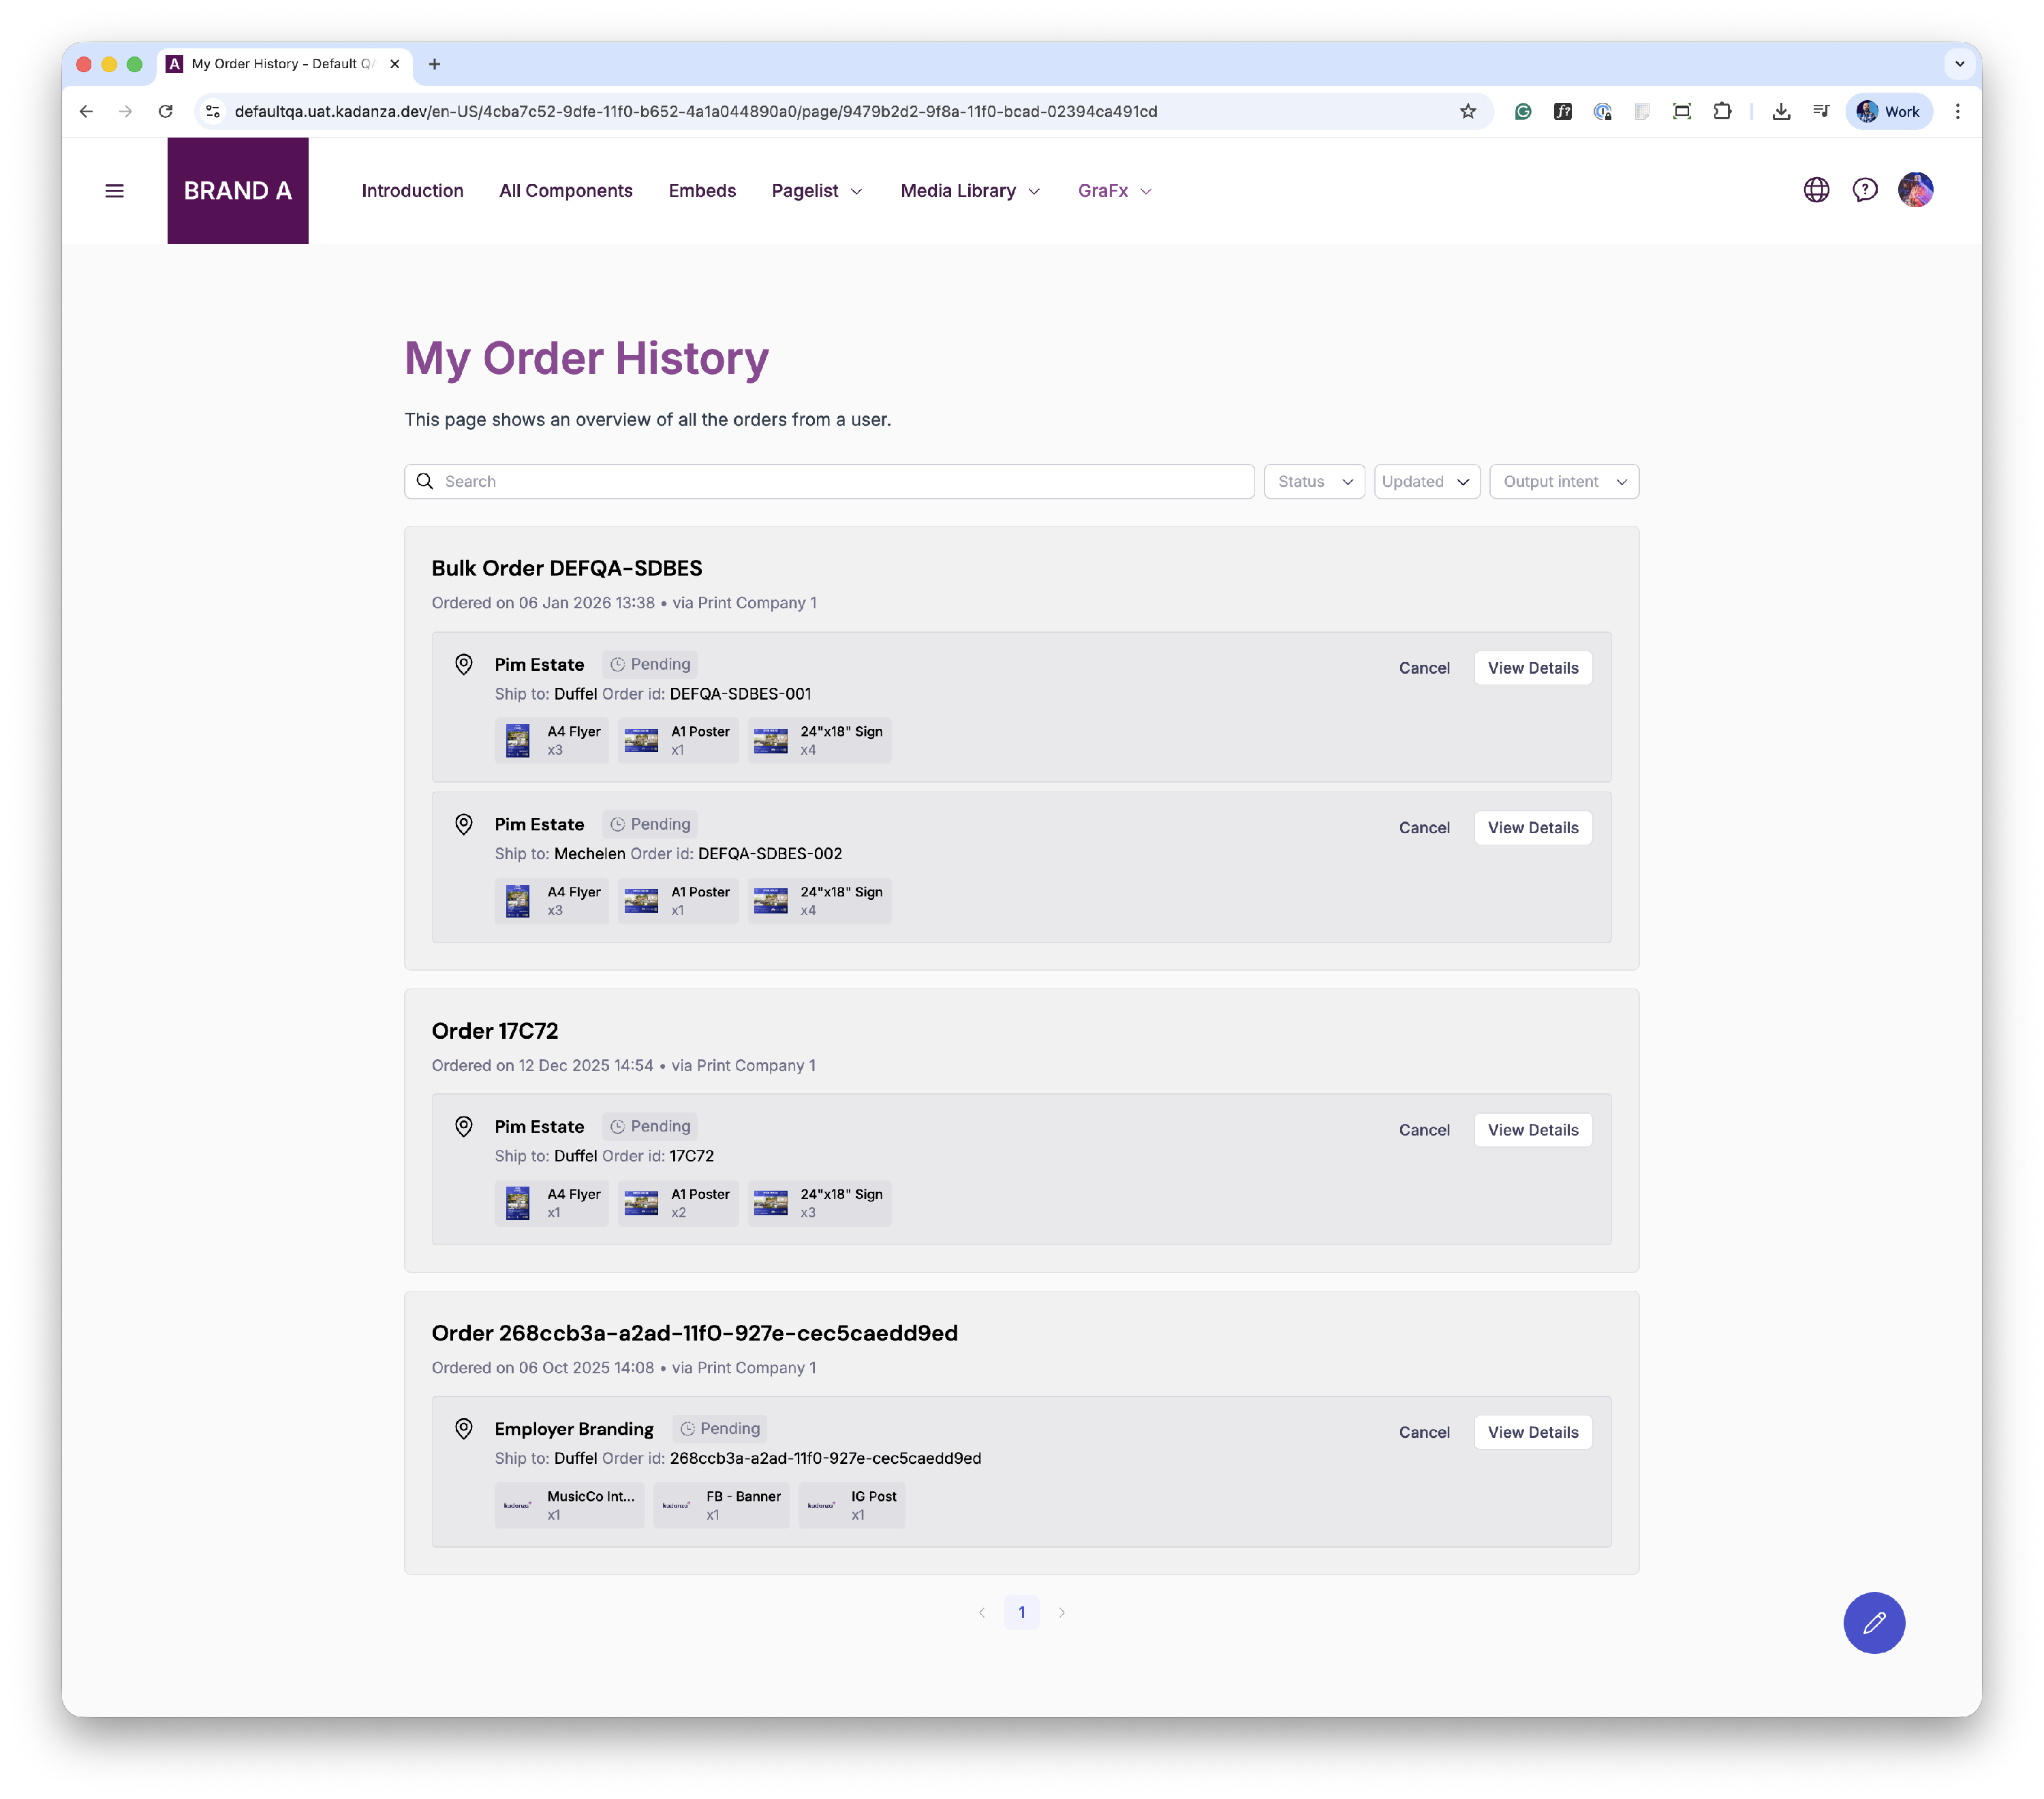
On this page, users see all the orders they have sent to a printer. From this page, they can cancel an order, at least as long as it hasn’t been picked up by a printer. Users can see details of individual orders and even cancel the print of a specific layout inside the order.
3. Managing print orders
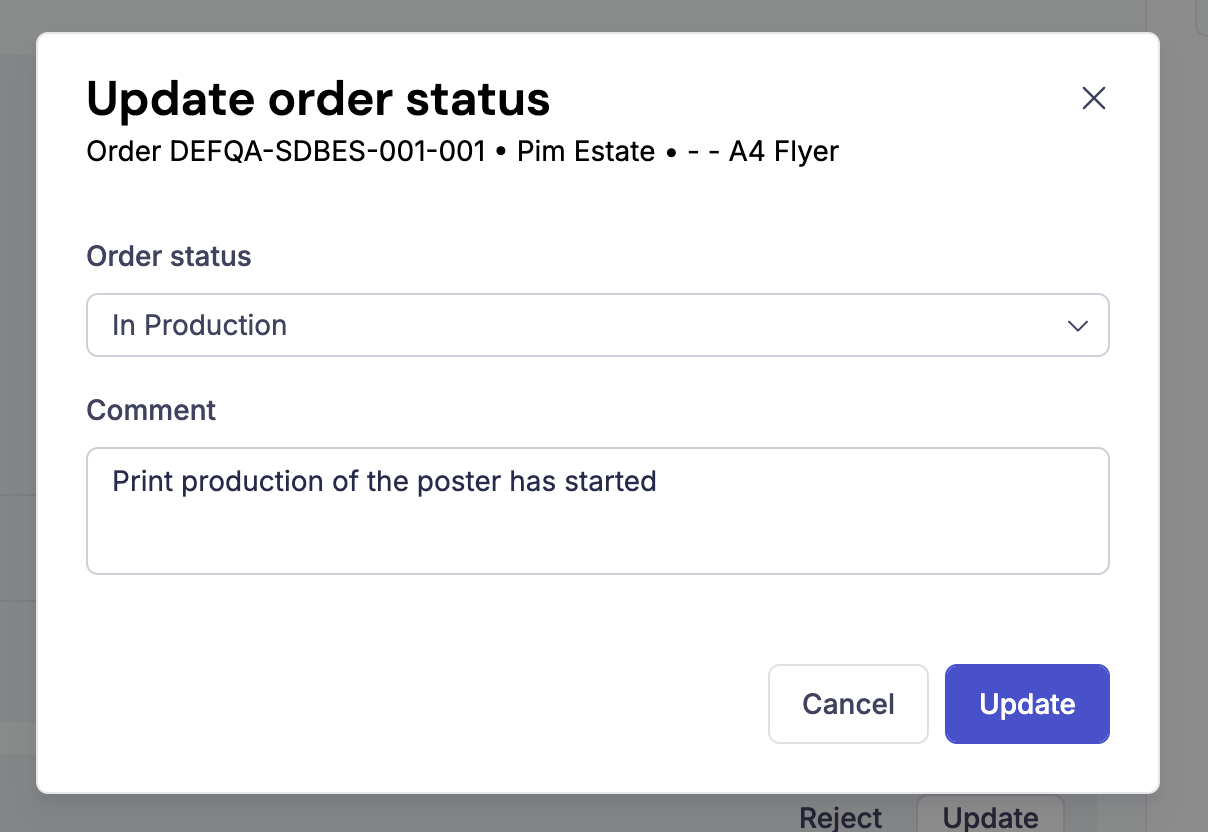
As print partner, you can access the platform and easily find all print jobs that are assigned to you. When an order is placed, printers will be notified via mail, after which they can log in to Kadanza and find more details and options for each order.
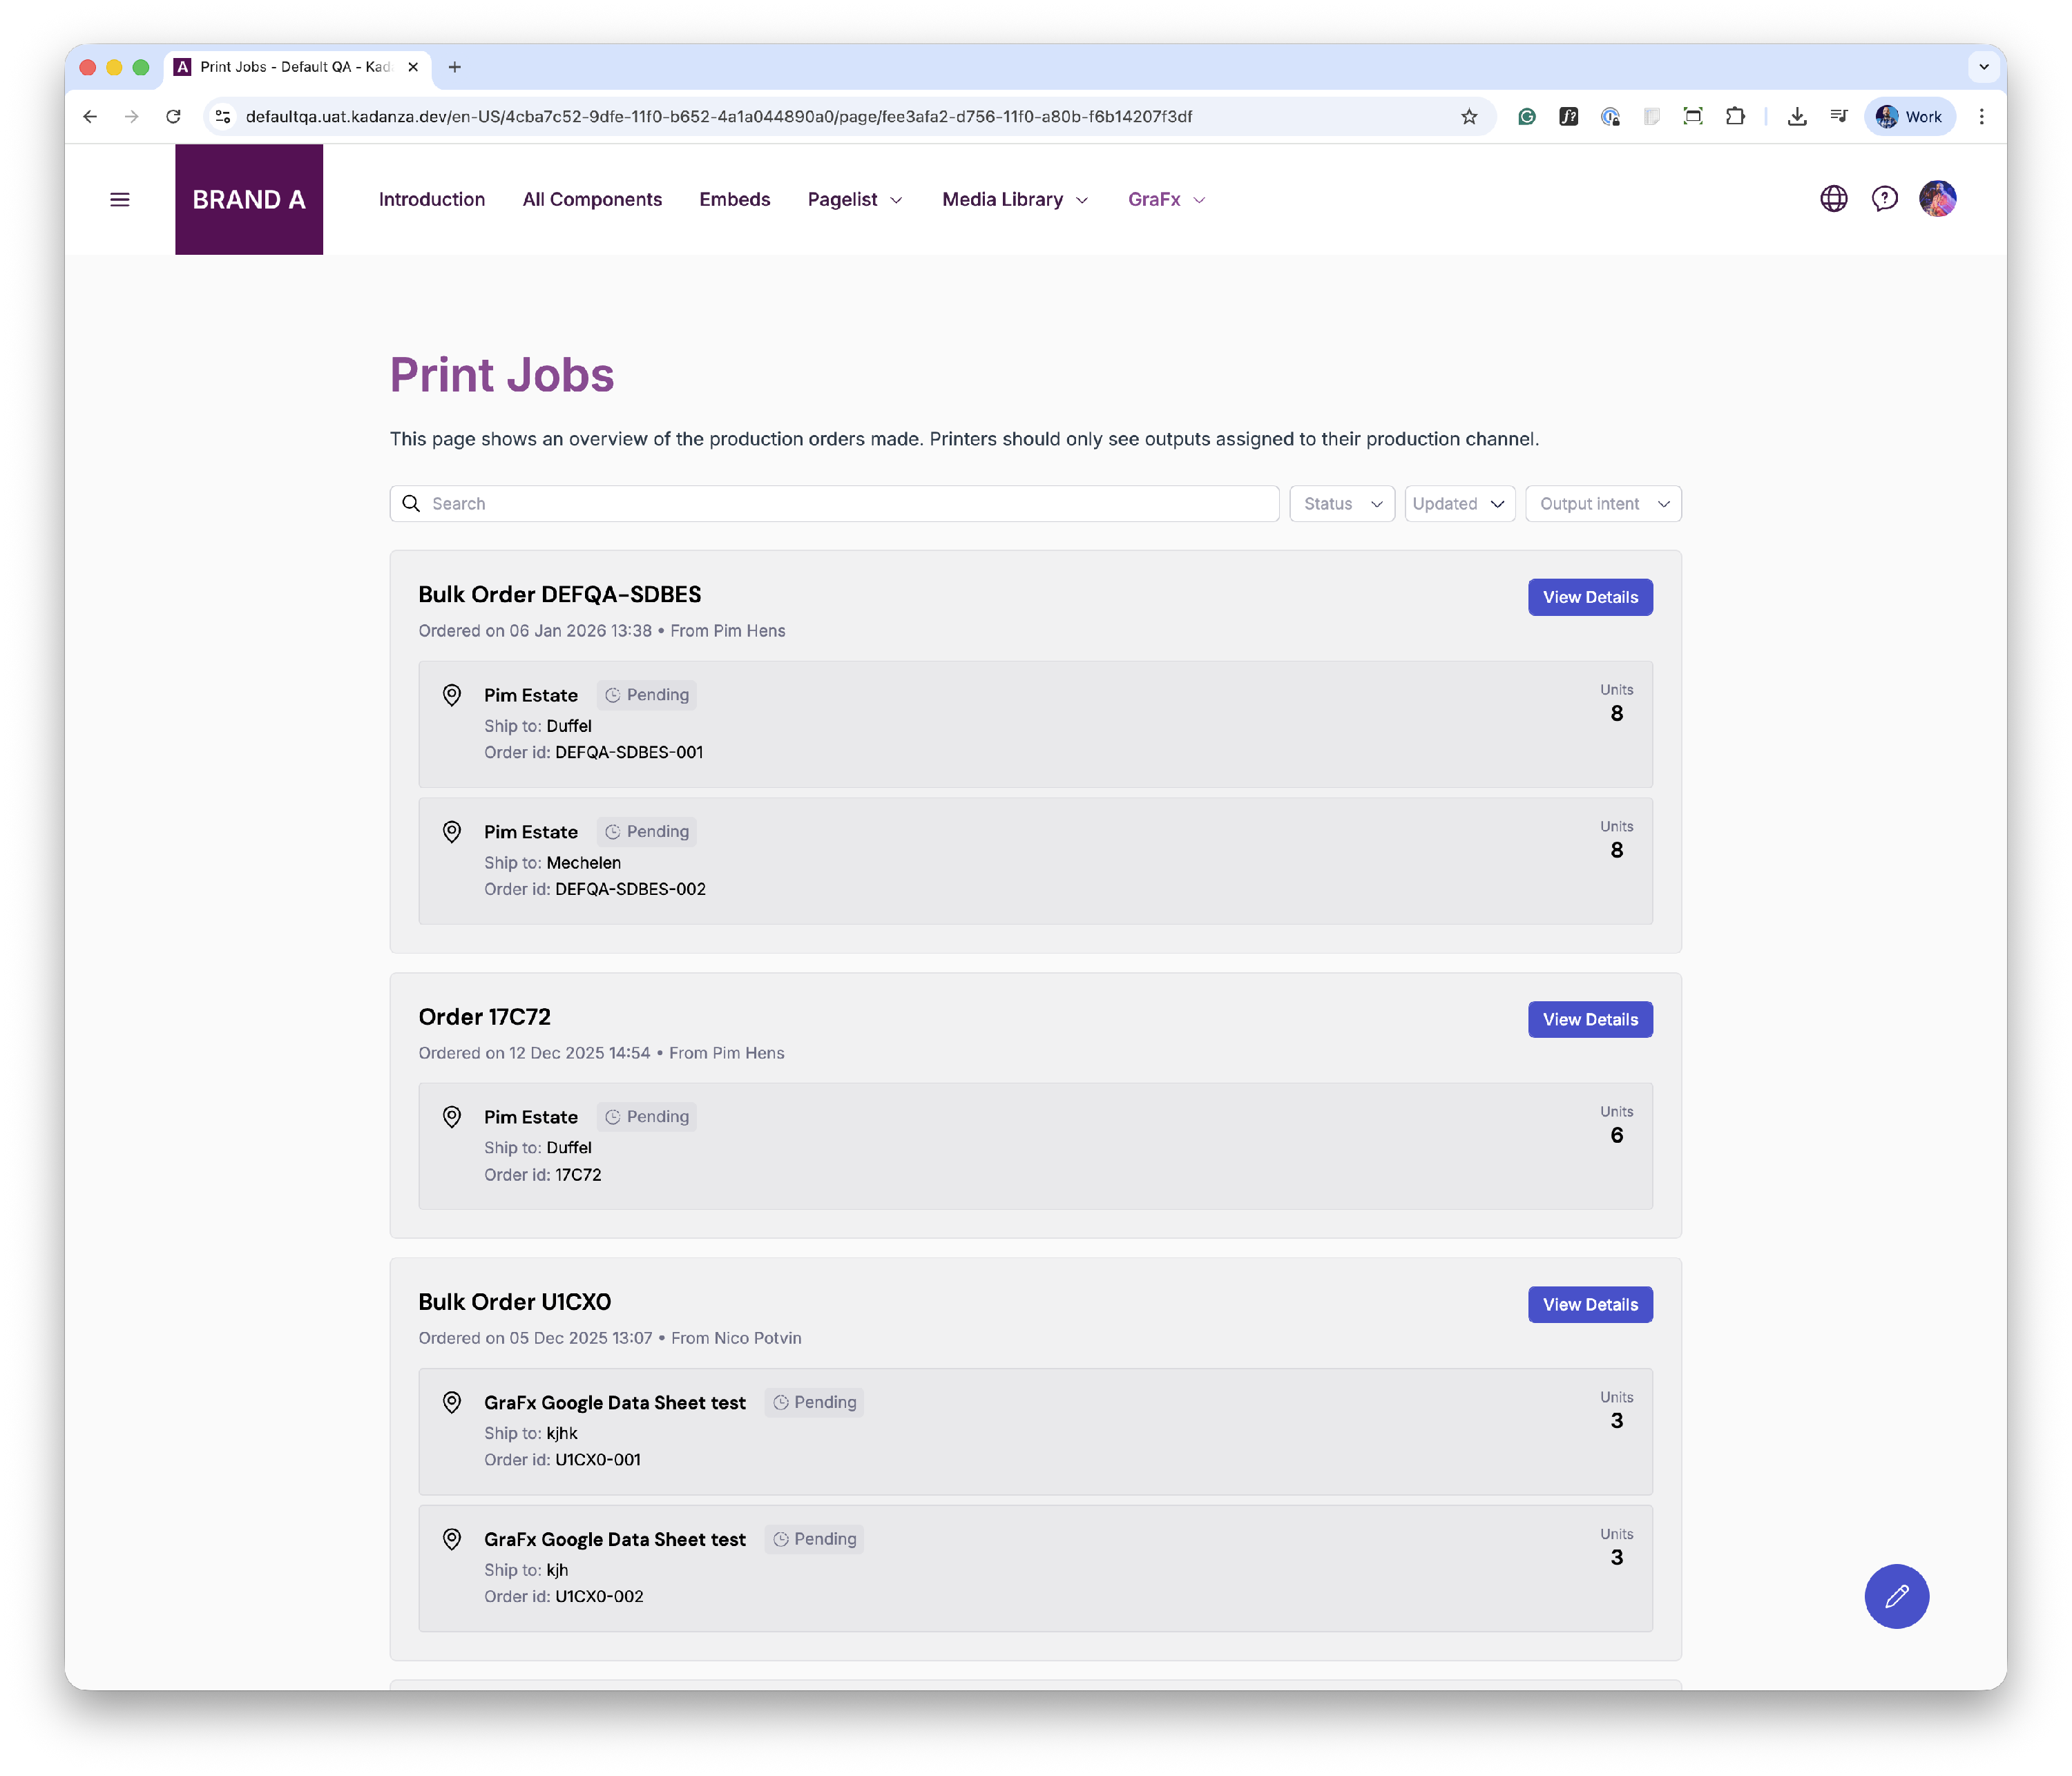
After clicking ‘View details’, more detailed information on each order is presented to the print partner. In these details, print partners can see
- The total number of prints ordered per layout
- The number of prints ordered per layout per address
- The different delivery addresses
- The general order info
- Download all PDF files in one go
- Download individual PDF’s per layout
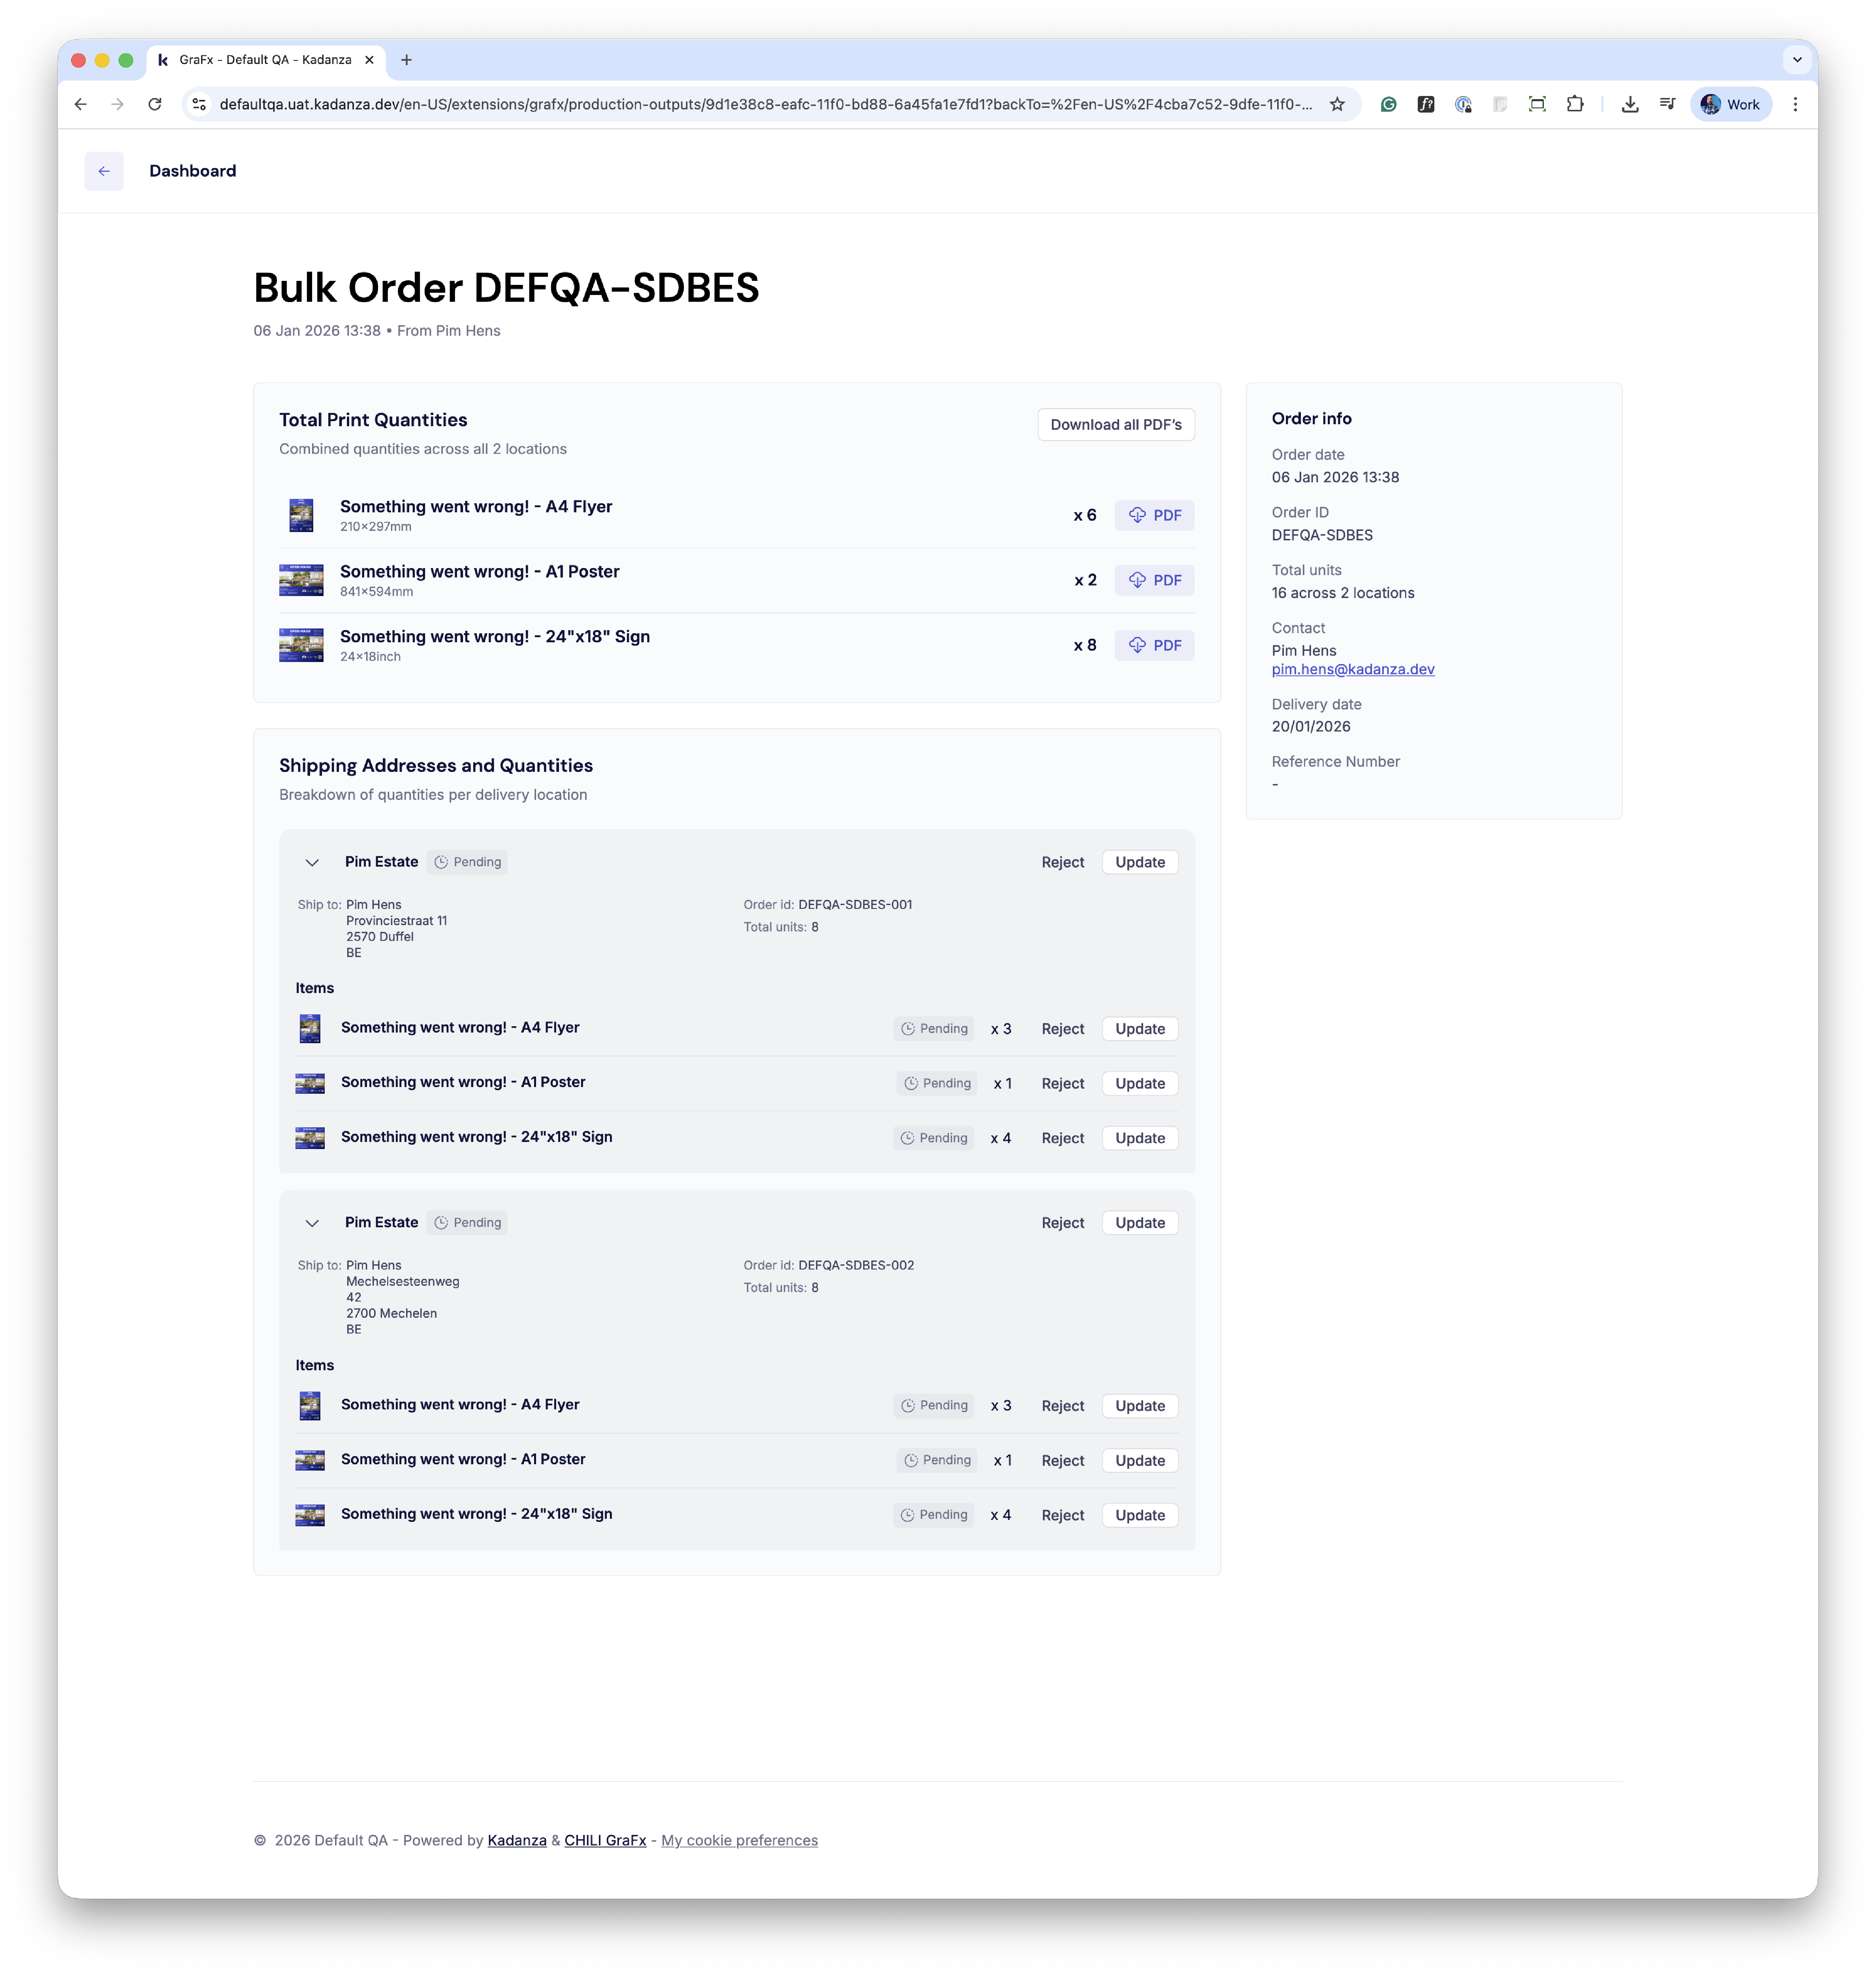
Printers can also update the status of each print, so the users have updated status information on their Order history page.